TABLE OF CONTENTS
Description
Shopware creates inspirational, emotionally appealing shopping environments. Open source, customizable and easy to use, this is the solution for modern online shops of any size. Enterprise edition includes enterprise client management and enterprise search capabilities.
By integrating Shopware with SyncSpider, you can automate key processes, synchronize inventory across multiple sales channels, and streamline data flow between Shopware and 400+ platforms
Entities
Source | Target |
| Product | Product |
| Order | Product Update |
| Cancelled Orders | Customer |
| Abandoned Cart | Order |
| Customer | Order Update |
Steps to Integrate Shopware
Step 1: Access the Integration Menu
Click on the ‘Integrations’ tab in SyncSpider. Click Connect new app and search for the Shopware module in the pop up window. You can also do this while creating a new task.

Step 2. Connect to Shopware Account
You will be prompted for the URL of shopware REST Server, Username and API Key.
You will also need to download the plugin.

Note: The URL points to the API SERVER URL, not to the SHOP URL, usually a proper URL looks like "https://domain.com/api"
Step 3. Access Shopware Credentials
Now, login to your Shopware account, go to the configuration tab and click on Plugin Manager.

Then, it will redirect to the account page.
Now, click on the option 'installed' to see all the installed plugins. As we have downloaded SyncSpider Shopware plugin you will see it in the installed plugins list as shown below.

After checking, you can go back to the menu. Now, click on the configuration tab and select user administration.

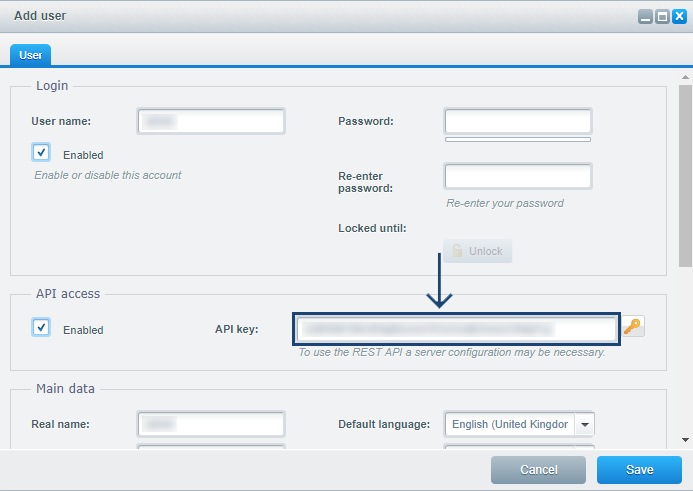
It will redirect to the page, select admin box and click on the user image as shown below.

:
Now, you will find the API key, copy it and go back to your SyncSpider application.
Step 4: Complete process in SyncSpider
Back in SyncSpider, all of your Shopware credentials and newly created API key and click on the Save button to complete the integration process.

Additional Resources
Learn more about SyncSpider's capabilities and how to optimize your Shopware integration with these additional resources:
- What are Source and Target Integrations?
- How to create a Task?
- Create a custom Collection field with SyncSpider
Shopware is just one of the tools we support!
To check the list of the tools and features we support please click here!
If you don't see your favorite tool on our list, please take the time and send us the request here to create an integration for you or UP-vote if it's already on the list :)
We develop integrations based on the requests and up-votes :)
We hope that this covers everything. If you have any further questions or need additional clarification please reach out to us via [email protected] or our chat widget!
Was this article helpful?
That’s Great!
Thank you for your feedback
Sorry! We couldn't be helpful
Thank you for your feedback
Feedback sent
We appreciate your effort and will try to fix the article