In this article we will be explaining the differences and possibilities of our Custom Fields. Here is the list of the custom fields we will be going through:
Here is a quick video explaining some of the Custom Fields:
Important NOTE: All of these fields can only be used for the Source Integrations
1) Calculated Field
First thing that is important is that calculated field can be only used with "number" value fields. Because SyncSpider has to register the calculation with numbers, as we will be adding VAT Price in % for the example that we will be using.
Lets say we are trying to transfer the price from Dokan to Shopify. As Shopify is expecting the price to be with VAT, but Dokan only has "Price" ( meaning without VAT) in this case we use calculated field.
So we go to the Configuration of Value Types for Dokan, and change the value type from "text" to "Number"

We can leave the settings for the "Price" field as they are, for this usecase.

Now we move to the mapping part, Here is where you create the "Calculated" Field.
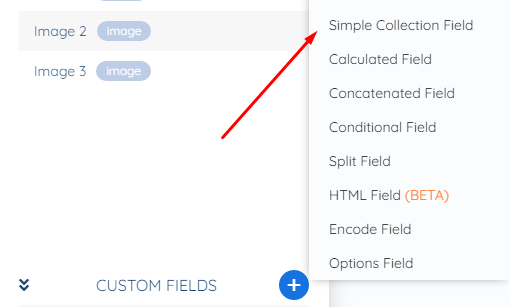
On the bottom left corner on mapping click on the + sign and click on "Calculated Field".

Here are the options for Calculated field that we will be explaining
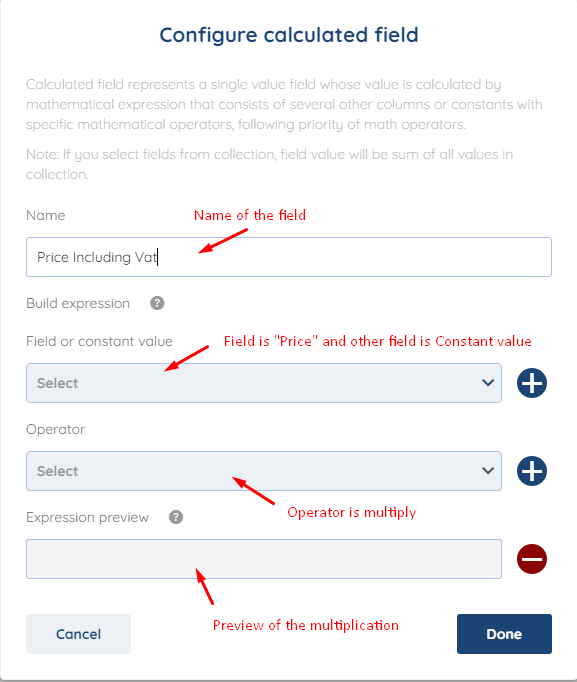
First you will name the field. You can put "Price Including Vat" or whatever you prefer but we would recommend that you put the % of VAT in the name of the field.
Next we add the "Price" Field that we were changing earlier and click on the + to add it to the Expression preview.

Now we will add the Operator "*" which in this case is "Multiply" as we are adding 20% ( this varies from usecase to usecase) to the Price. When adding the VAT you Multiply the original number with the % of the VAT, so in this case it will be Price * 1.2 ( as 20% is 0.2 of the original Price)

To add the % of VAT, now we add another field which is constant Value and set it to 1.2 as explained above how the multiplication of VAT works.

When we have added all the fields and Operator for this example, the preview should look something like this.

When you have created it, just pull it from the bottom left corner and connect it to the "Price" of Shopify in the mapping section

This is all for the Calculated Field,
2) Simple Collection Field
Simple collection field is making normal fields into collection fields. Meaning if one side of mapping is a collection field, you can create a simple collection field to connect all your fields of the same type into a collection on the other side of mapping.
Let us give you an example:
IT Scope to Shopify
IT Scope has Images as fields that are seperate , so we want to add them to a small collection field so we can map them with Shopify in one Collection field.
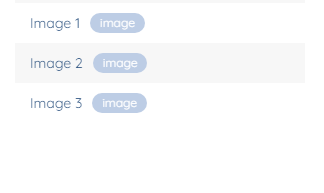
We can do this by going to the mapping section, and on the bottom left corner click on the "+" sign then click on "Simple Collection Field"
Here are the settings for the Simple Collection Field
Name - Name of the collection
Field Name - Name of the field under that collection
Type - Type of the field, for Simple collection it can be only Collection
Combine Column - Here is where you combine all the columns.

Find the field you are looking for and click on the "+" sign do that until you add all the image Fields.

When you are finished, It should look something like this
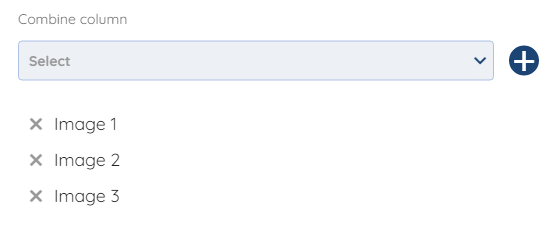
That is it for mapping of the Simple collection field, now you simply use that field
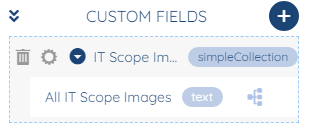
And map it with the collection for Shopify Field,

That is all for the simple collection Field.
3) Conditional Field
Conditional Field is a field that you can use if some kind of main value is missing but you have another value that can be used to map that field, let us give you an example.
Dokan to Shopify
If you want to transfer 3 Products and 2 of those 3 products have SKU , but only one has Product ID. In this case you use Conditional Field to transfer all 3 of the products. Let us elaborate on this.
Usually SKU is a requirement for Product transfer, so it will be marked with a small orange dot meaning that field is "Required" to be mapped so the task can work correctly, it looks something like this.

To create and set a Conditional Field. We can do this by going to the mapping section, and on the bottom left corner click on the "+" sign then click on Conditional Field.
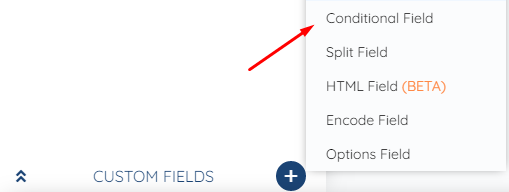
Here are the options for Conditional Field
Name - Name of the field
Match By - Matching by the field you are trying to set the Condition ( Rule) for that specific field.
Choose Condition - Is set, Is not set, Equals, Not Equals, In a Sequence, Not In a Sequence and Like
Enter Value - Set the value of the field ( in this usecase we will not be using this setting)
Set output value field or constant value if rules are met - Example for this usecase ( if The matching field is SKU, and is "Not Set" then we will use Product ID field as the field for that specific Product
Otherwise - A field that we use in case the Set output value field has no value
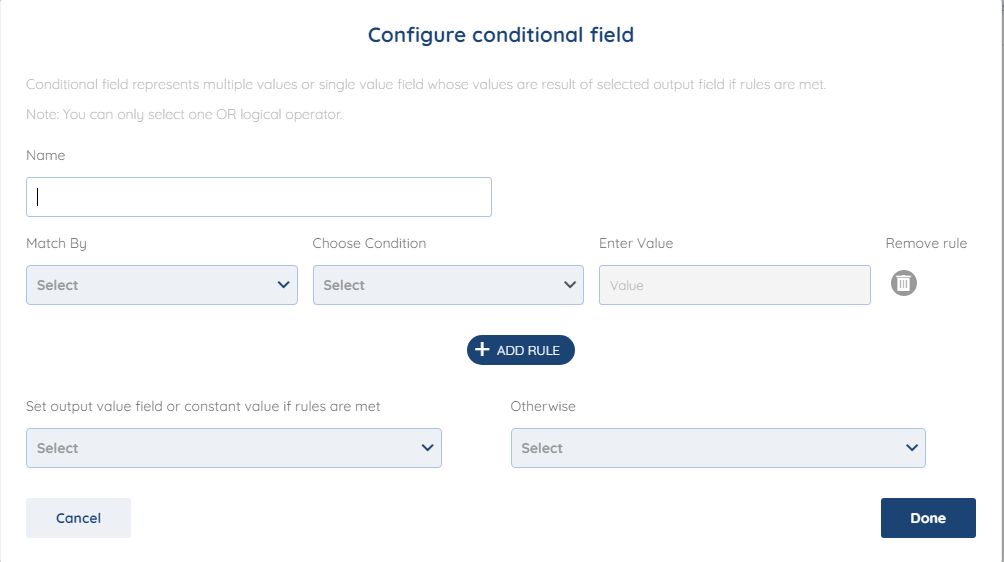
With the explanation from above, this is how we mapped the Conditional Field,

Name it as you wish. Match it by SKU as a main Value, we added condition "Is not set" so if it is not set then we will use the Product ID as the output Value ( meaning if SKU is missing we use the Product ID) and if Product ID is missing, we use SKU for the "Otherwise" field.
After we have mapped everything. Click on Done, and simply connect the Conditional field with the "SKU" Field.

That is all for the Conditional Field.
4) Split Field
Split field is used to split a field into 2 sub-fields or more depending on your usecase.
Example : Google Sheet to CSV (Using full name to split it into a Name and a Surname)
To create and set a Split Field, We can do this by going to the mapping section, and on the bottom left corner click on the "+" sign then click on Split Field

Here are the options for Split Field:
Name - Name of the Split Field
Set Number of fields - A number of fields under the Split field
Set Seperator - Comma, Period, Semicolon, Tab, Space, Other ( For other you use the specific seperator in that usecase, it can be any special character that is used for it)
Field names - Name of the fields under the Split field
Select field to split - The field we are spliting this field from.

Here is how we configured it

Name it as you wish, we set number of fields to 2 because we only use 2 fields ( Name, Surname)
Separator is Space because in our google sheet it is set as space

Field names are Name And Surname as that is what we are trying to split here
And the field we are splitting is the Full name for this use-case.
This is how the custom field will look like when it is done

Now we map them to their appropriate positions,

And as we can see everything transfered correctly from our "Preview Values" Option
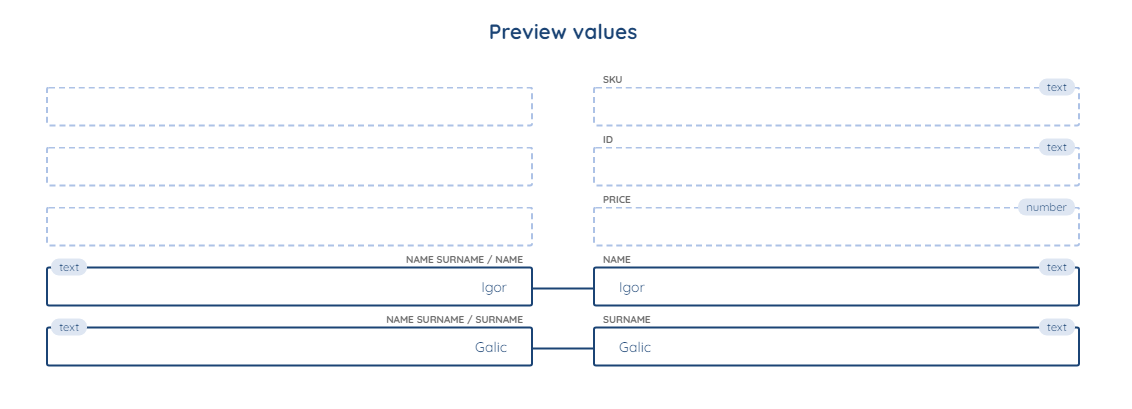
That is all for the Split Field.
5) Concatenated Field
Concatenated field is used to merge 2 or more fields to get an Unique field per use-case to be able to map certain fields that you couldn't map without it. It is somewhat reverse from Split field.
Example: Google Sheet to CSV Name and Surname to Full Name
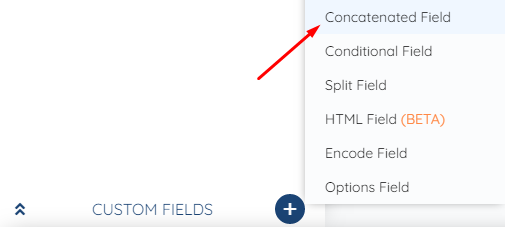
To create and set a Concatenated Field. We can do this by going to the mapping section, and on the bottom left corner click on the "+" sign then click on Concatenated Field
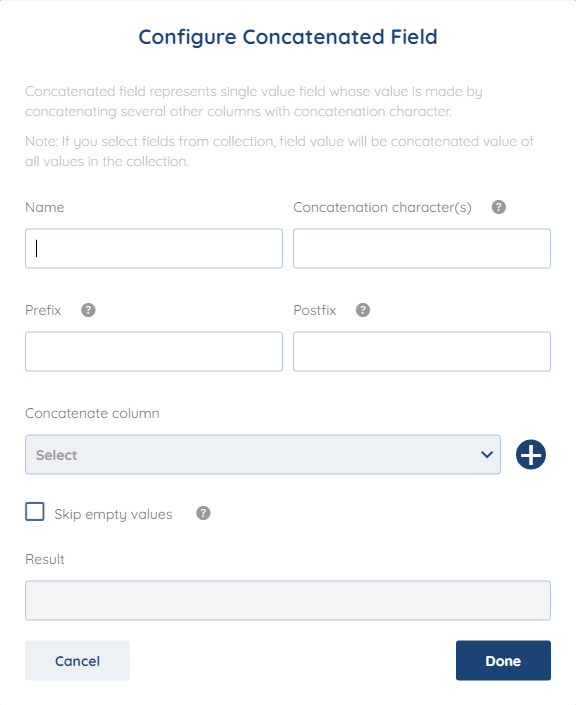
Here all all the options for Concatenated field:
Name - Name of the Concatenated Field
Concatenation Character(s) - A Special character that will stand in between the Fields that you are concatenating, so in this case it will be Name (special character ) Surname . It can be "." "-" , space or any kind of special character that you wish to use.
Prefix - A Letter or a number before the concatenated field so in this case you can put Mr, Sir, Miss etc.
Postfix - A Letter or number after the concatenated field
Concatenate Column - Here is where you choose the fields you are concatenating, after you choose a field click on a "+" sign to add it to concatenation
Skip empty values - Skip all the fields that doesn't have a value in concatenated field
Result - a preview of how the field will look after you have configured this field.
This is how the settings look after we Map everything

After you have mapped everything, just connect the Concatenated field with the Full name field and voila !

As you can see everything is as intended in the preview values

6) Combined Field
Combined field takes 2 or more fields and combines them into one field that you can use to map multiple fields, unlike "Collection" Field which can only map Collection Fields
EG. Google Sheet to CSV (First and Last Name to Full Name)
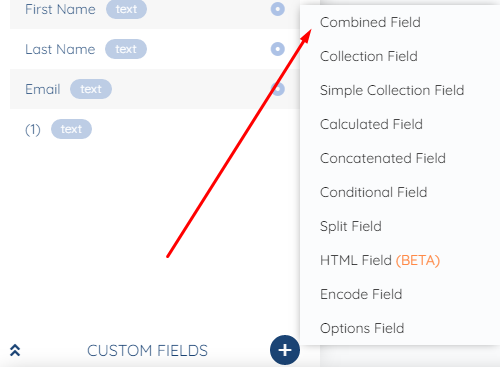
To create and set a Combined Field, We can do this by going to the mapping section, and on the bottom left corner click on the "+" sign then click on Combined Field
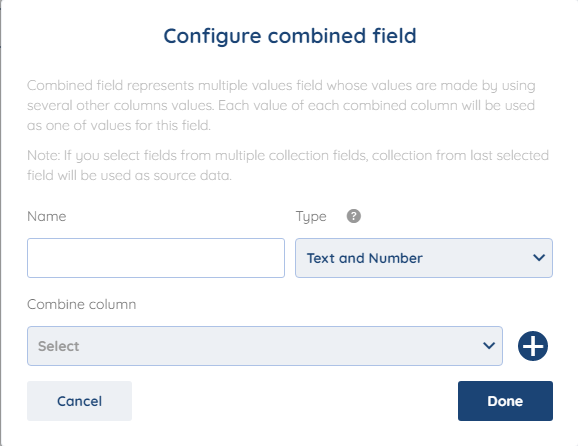
These are the options for Combined Field
Name - Name of the Combined Field
Type - Type of Values ( Text And Number, Date or Image) In this case we will use Text and Number as we are using First and Last Name
Combine Column - Here we will chose which Columns we Combine
Here is how it should looks completely Mapped

When we map the custom field with the "Full Name" destination field it is very important that we set "Take all (concatenate) " in the Multi values behavior so that the custom field we created takes both values and not only the first or the last.
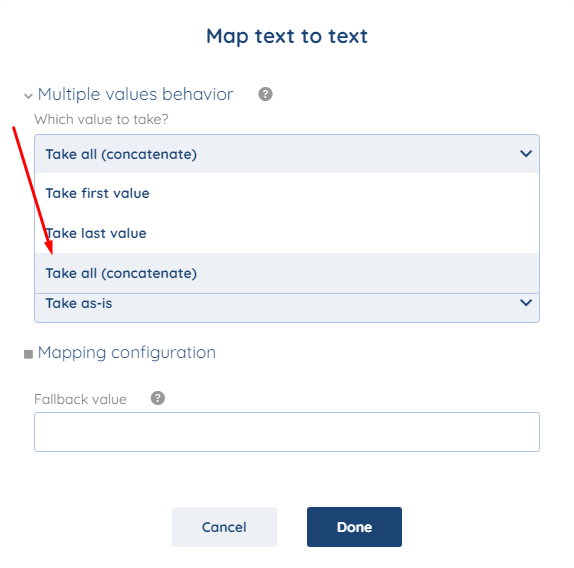
As you can see , everything mapped correctly in "Preview Values"

7) Collection Field
Collection field represents multiple values field whose values are made by using several other columns values. Each value of each combined column will be used as collection of values for this field.

Here are the Options for Collection Field:

Name - Name of the Field you are creating
Type - Type of field ( In this case it can only be Collection as it is a Collection Field)
Combine Column - Columns you will combine to get the collection of fields
Note: If you select fields from multiple collection fields, collection from last selected field will be used as source data.
This Custom field is the same as combined field the only difference is that we use it for "collection" fields.
8) HTML Field (BETA)
With our HTML Field, you can send an HTML encoded message in any way you wish, for todays example, we will use the HTML as an email, meaning that we will compose an email that we will be sending out.
To find HTML field simply go to your mapping on the bottom left click on the "+"
sign where it says custom fields and click on HTML Field
IMPORTANT NOTE: HTML Field is still in beta and we will be adding other features to it.

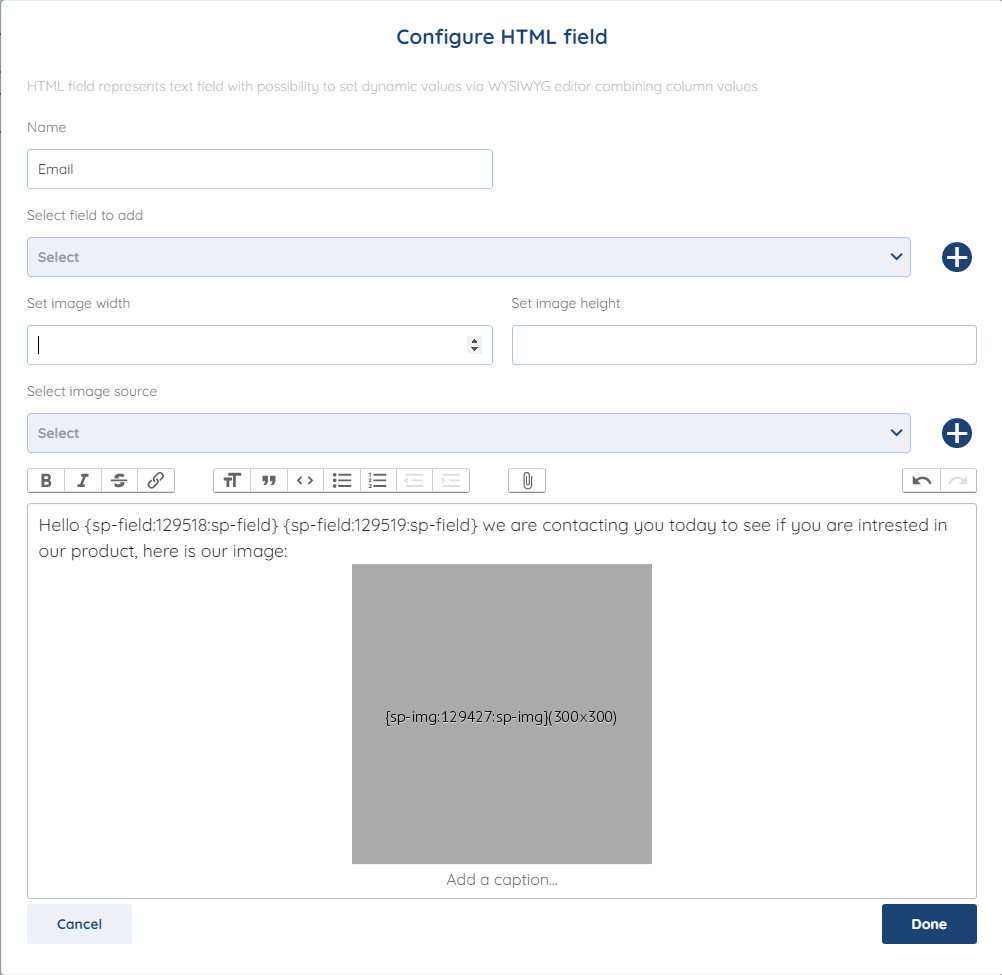
Here are all the options for the HTML Field

You can use your own HTML code to add in this field

Name - Name of the custom field ( in our usecase Email)
Select Field to add - All the fields in the source mapping
Select Image Source - Add an image
Now we will be composing an email for example purposes. First I will be adding a first and a last name, We can do that by clicking on Select Field to add, finding First name and last name and adding it. This is how it should look like in HTML

Then we will add an image and choose it's width and height, and you can add a caption to it, it should look like this ,
Here is the end example,
9) Encode Field
Encode field is used to send an encoded message in a certain format that you choose.
To find Encoded field simply go to your mapping on the bottom left click on the "+"
sign where it says custom fields and click on Encode Field

Here are all the options for Encode field

Name - Name of the encode field
Encode Type - Type of encoding ( sha1 , sha256, md5, hash, base64_encode, crypt, crc32 and ord) If there is a type of encode missing that you wish to use , please contact our support and we will add it as soon as possible.
Field to Encode - All the fields in the source mapping that you can encode
Get URL content - If the field you are trying to encode contains an URL that should be encoded check this box.
10) Options Field
Option field is used for mapping with the option fields, meaning you can set one value that you are receiving into another and send that other value of your choosing.
To find Options field simply go to your mapping on the bottom left click on the "+"
sign where it says custom fields and click on Options Field

Here are all the settings for the options field
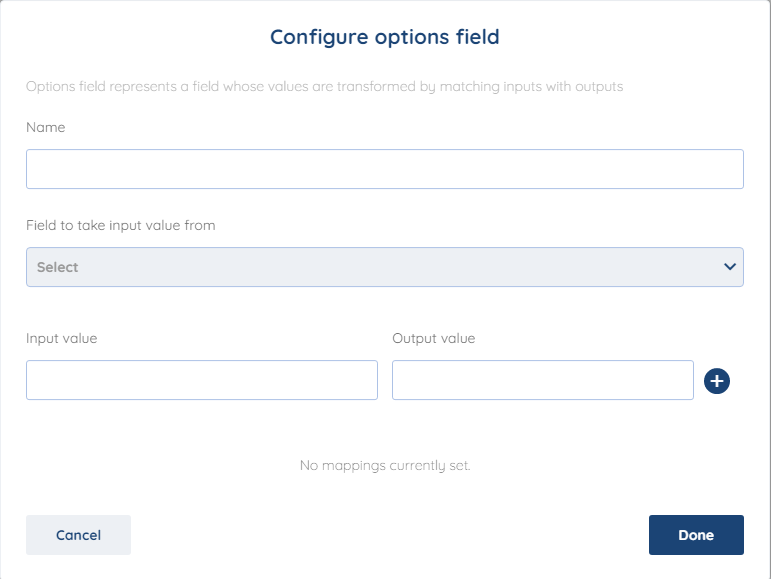
Name - Name of the Options field
Field to take input value from - Field you are taking the data from
Input Value - Data you are receiving from the field
Output Value - Data you are sending from the field
For this use-case, we will use Colors. Lets say that colors in our Shopify store of a T-shirt are Blue, Green and Red we will set the input value for Blue to be 1 , For Green 2, and Red 3, and put the Output value to Blue Green and Red, it should look something like this.

So now, when we receive data from our source integration, we will know which color is which number when we are sending out that data.
11) Date Manipulation Fields

Name - Name of the Data Manipulation field

Field for date manipulation - The Field that you are taking the data from

Output field format - The Field type that the Field for date manipulation will be converted to.

You are presented with the following Output options:
Date
Text
Number (timestamp)

Time Zone - The time zone format you wish to convert the date to

Date Format - Defines the format the date will be converted into
e.g.
YYYY-MM-DD hh:mm
DD-MM-YYYY hh:mm:ss

We hope that this covers everything. If you have any further questions or need additional clarification please reach out to us via [email protected] or our Chat Widget!