1) Description
Dynamics 365 offers automated, integrated, and intelligent sales and marketing capabilities that efficiently connect, prioritize, and convert leads into paying customers. It is built on Microsoft Azure, which offers both a trusted platform and a broad ecosystem of services.
2) Entities
Source | Target |
Account | N/A |
| Contact |
3) Steps
Step 1: Select the Dynamics 365 Integration

Step 2: Enter the Integration Name

Step 3: Enter your Instance URL Address

1. Sign in to your Microsoft Dynamics CRM account.
2. Press the square ‘Dynamics 365’ on the left side of the page.


4. Once that's done, go to your browser address bar and copy a link address (from the beginning till the /main.aspx/ ). It could contain the words “dynamics.com” or even not.
Note: If your URL is https://crm.your-systems.com/your-system/main.aspx. You should copy “https://crm.your-systems.com/your-system/” and paste it as your Instance URL in the Integration setup window.
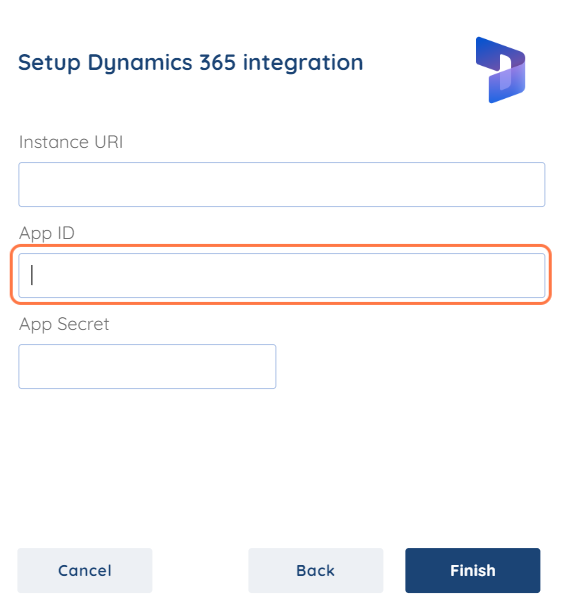
Step 4: Enter your App ID
1. From the Dynamics 365 landing page, click the Dynamics 365 — custom card:

2. Click the App Launcher icon in the upper left corner:

3. From the app launcher, click Admin.
4. In the menu under Admin centers click Azure Active Directory:

5. In the Azure Active Directory dashboard menu, click Azure Active Directory:

6. An additional menu will display. From the Manage section of the menu click App registrations:

7. On the App registrations page, click New registration:

8. On the Register an application screen, specify the initial details of the application:

Enter a Name. For example: ConnectCRM.
Under Supported account types, select the appropriate option for your integration.
9. After clicking Register, click Manifest under the Manage category on the left. Ensure that allowPublicClient is set to true and click Save:

10. Click API permissions under the Manage category on the left. Under Configured permissions click Add a permission:

11. On the Request API permissions screen, select Dynamics CRM:

12. The Permission section is displayed. Within it, select the user_impersonation permission and then click Add permissions.
13. You are returned to the API permissions screen for the application. Under Configured permissions, click Grant admin consent for <Directory>:

14. Acknowledge the dialog to grant consent for the directory:

15. Under Configured permissions the Status column will show that consent has been granted for each added permission:

16. On the Overview screen, the Application (client) ID is displayed. Copy the Application ID code and insert it into the Integration window.

Step 5: Enter your App Secret
To obtain your App Secret please follow the provided steps below.
1. Click on Certificates & Secrets and create a new client secret.

2. Add a name and define the expiration duration of your secret value.
Then click on Add.
Your client's secret is now created.
Note: Keep in mind that you need to store your client's secret ( App secret) somewhere safe because you won’t be able to copy it again once the page is reloaded.
Copy and paste your App secret ( client's secret) into the Integration window and press Finish.
If you have any further questions or need additional clarification, please contact us via [email protected] or our chat widget!
Was this article helpful?
That’s Great!
Thank you for your feedback
Sorry! We couldn't be helpful
Thank you for your feedback
Feedback sent
We appreciate your effort and will try to fix the article