TABLE OF CONTENTS
1. What is the Option field
The Options field represents a field whose values are transformed by matching inputs with outputs. Meaning that A field on the left side can represent a field on the right side.
2. Options field settings

2.1 Name
The name of the options custom field that you would like to see in the Mapping section.
2.2 Field to take input value from
The field you would like to take the values from.
2.3 Use template
Possibility to use the template that has already been set.
2.4 Transform field to option type
This option will change the original field type to option type.
2.5 Input Value
The value that you would like to receive from this field.
2.6 Output Value
The value that you would like to send from the custom field.
3. Example and how to use it
The Options field is used for mapping with the option fields, meaning you can set one value that you are receiving into another value and send that other value of your choosing.
To find the Options field simply go to your mapping on the bottom left and click on the "+"
sign where it says custom fields and click on Options Field

Here are all the settings for the options field:

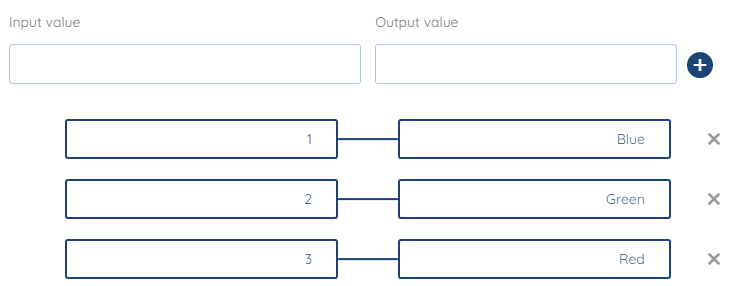
For this use case, we will use Colors. Let's say that the colors in our Shopify store of a T-shirt are Blue, Green, and Red we will set the input value for Blue to be 1, For Green 2, and Red 3, and put the Output value to Blue Green and Red, it should look something like this.

So now, when we receive data from our source integration, we will know which color is which number when we are sending out that data.
We hope that this covers everything. If you have any further questions or need additional clarification please reach out to us via [email protected] or our Chat Widget!
Was this article helpful?
That’s Great!
Thank you for your feedback
Sorry! We couldn't be helpful
Thank you for your feedback
Feedback sent
We appreciate your effort and will try to fix the article