Here is a small video explaining the basics, while we will go a bit more in depth with the help file:
First step is to integrate WooCommerce And Dokan.
Here you can find help file to integrate WooCommerce
Here you can find help file to integrate Dokan
Step 1.
Choose which entities you want to use for WooCommerce in this example we will transfer Products.

Step 2.
Choose which entities you want to use for Dokan

Step 3.
WooCommerce Options
After you have chosen Both Entities ( In this case Product) we move to the WooCommerce Options,
Here we will use SKU and transfer all Products, it is your choice which dates you will set.
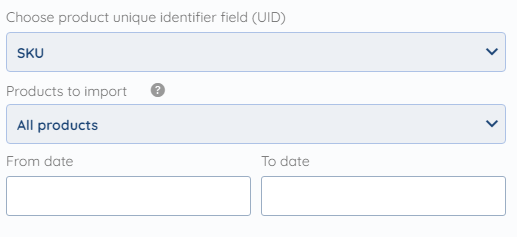
Here are all the other options for the UID ( Unique Identifier )

And all the options for Products to Import

Note: If you are choosing All products, you can choose specific dates you wish to transfer Products from.
Step 4. (Optional)
Filters
In this specific use case we don't need any filters but you can use them if needed.

Step 5.
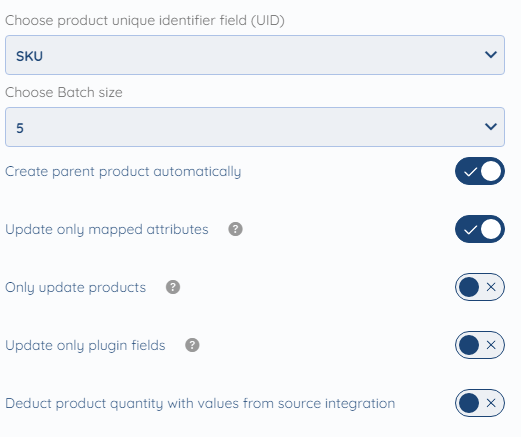
Dokan Settings
These are all the settings for Dokan , we can choose different Unique Identifiers ( Like Product ID, Name etc. )
Choose the batch size of your preference ( lowest is 1 highest is 100)
We will leave Create parent product and Update only mapped attributes on as these are basic settings. Other settings are per use case but we will leave them off.
Step 6.
Mapping
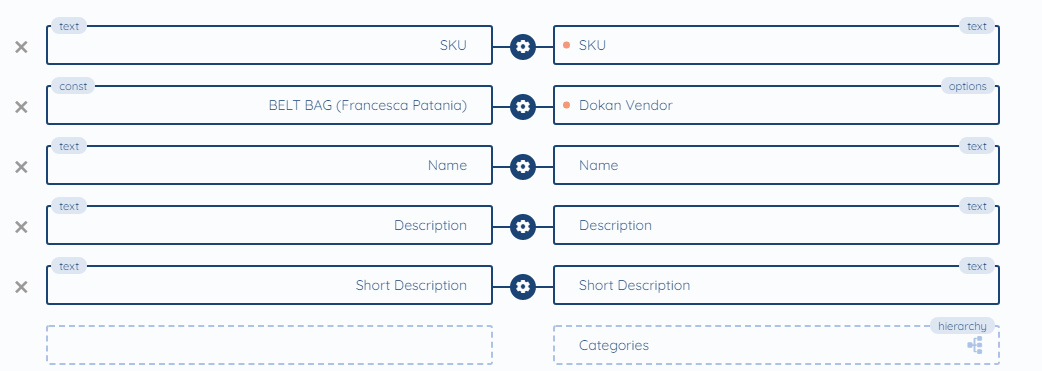
In mapping we would recommend to map as much fields as you need, So that SyncSpider can recognize data correctly and transfer everything as intended. I will show you the mapping that we chose for this specific use case, but it may wary depending on the use case.
Note: You can use our AI Mapping feature that is in the bottom right corner of the Mapping.


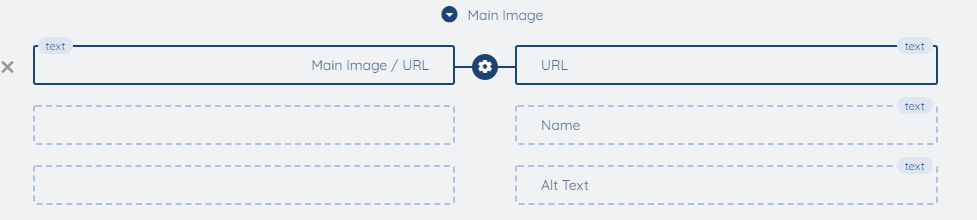
Main Image:
Images:

Pa_Colour:

That is everything for the mapping part.
As stated above it can wary from use-case to use-case so it is IMPORTANT to map as you prefer and need it.
Step 6.
Task Settings
First we set the name and Description (optional) of the task .

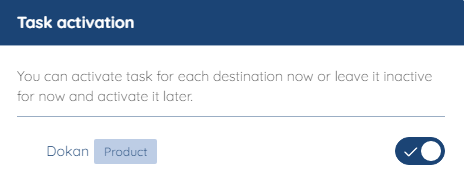
On this setting, you can activate the task instantly or leave it for later
This setting is also optional. But you can set this task to trigger your email when the task succeedes/fails

And Lastly Automation
Here you can set the trigger of the Task.
We set the trigger on Event to trigger the task whenever new Product is created.

As this task is now completely configured. we can finish and activate it.
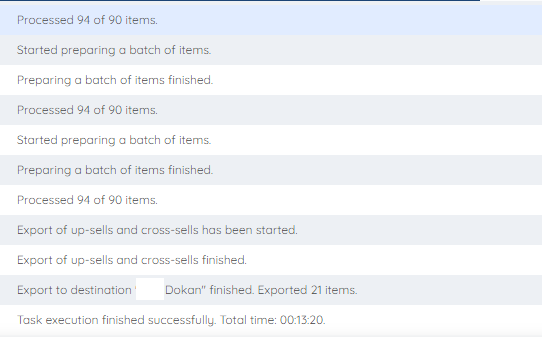
As we can see from execution of the task. everything went smoothly.
With this we will end our help article.
To check the list of the tools and features we support please click here!
If you don't see your favorite tool on our list, please take the time and send us the request here to create an integration for you or UP-vote if it's already on the list :)
We develop integrations based on the requests and up-votes :)
We hope that this covers everything. If you have any further questions or need additional clarification please reach out to us via [email protected] or our chat widget!
Was this article helpful?
That’s Great!
Thank you for your feedback
Sorry! We couldn't be helpful
Thank you for your feedback
Feedback sent
We appreciate your effort and will try to fix the article