In this article, we will be going over a seamless process of adding new products from Google Sheets to WooCommerce via SyncSpider. Additionally, a short and simple method for updating products (synchronizing stock and price) will be explained.
WooCommerce is one of our most popular and used Integration Modules. Partially because it's one of the most used online stores (being a WordPress plugin), but also because adding new products, as well as updating them, becomes a breeze with the help of SyncSpider.
You can migrate products from any platform/app we currently support, one of them being Google Sheets.
Google Sheets as a Source of your products has many advantages.
a) It is highly customizable. Each sheet column will get created as a unique field when uploading the sheet in the "Source configuration" section of the task setup.
b) You can filter the data, where each above-mentioned field becomes a unique criteria.
c) You can incorporate said sheet into your workflow, sending only newly added data, to avoid duplicates.
Let's get started!
Regardless of how you get product data, the following columns are highly recommended to put in your sheet:
SKU | Name | Description | Short Description | Categories | Tags | Price | Quantity | Size |

Now that you've set up the columns, and entered the appropriate data in each of them, we can begin configuring the task.

After selecting Google Sheets as the Source integration (one that is sending out data) and WooCommerce as a Target integration (one that is receiving the data), you will be asked to configure the source integration.
First, we need to select a path to the sheet's location, and the sheet itself:

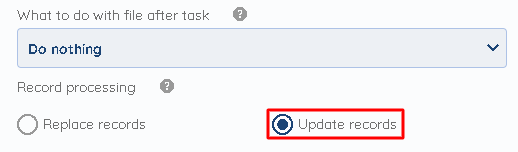
Then, select "Update records" as the preferred Record processing method:
As always, unique columns that SyncSpider will monitor for changes will need to be selected:

Once done, click "Next", and you will be taken to the Source Filtering section.
Filtering is an optional step, however there are a couple of points to be made:
a) You can filter the data based on Google Sheet's columns
b) You can add as many filters as you'd like
And perhaps the most important one:
c) Filtered values will not get excluded. Rather, only values satisfying the filter criteria will get exported.

After you click "Next", you will get taken to Target (WooCommerce) configuration screen.
Here you need to select the unique identifier.
We highly recommend you opt for SKU (stock keeping unit) as it is the most used and shared unique product number across multiple sale channels.

Next, we need to choose how the products are actually going to get sent, are they going to be just updated, or only have certain things such as mapped attributes and/or plugin fields updated.
If you wish to get new products, leave everything unticked.
"Create parent product automatically" is completely optional, based on your business needs.
Another extremely useful, but situational, option is "Deduct product quantity with values from source integration".
e.g. When you use some ERP software as master - by which you manage products via POS and web stores.
By receiving an order in POS, you don't want to transfer that order to the store or vice versa - but rather just want the stock synchronized.
By selecting Order as the source Entity, and Product as the target Entity, ticking "Deduct product quantity with values from source integration" and only mapping SKU and stock fields - the stock would get synchronized.

The next step is mapping. If you followed this article so far then this should be a complete no-brainer.
Simply drag and drop the fields on the left-hand side (Source fields) next to the fields on the right-hand side (Target fields). Fields have matching names, so you have an easier job of doing so.
For all unmapped fields such as "taxable", "virtual product" etc, feel free to either make another column in the sheet OR use constant values to map them.

We are almost done!
All you have to do now is rename your task and give it a description (optional), but more importantly - decide how the task will get triggered.

You can either select:
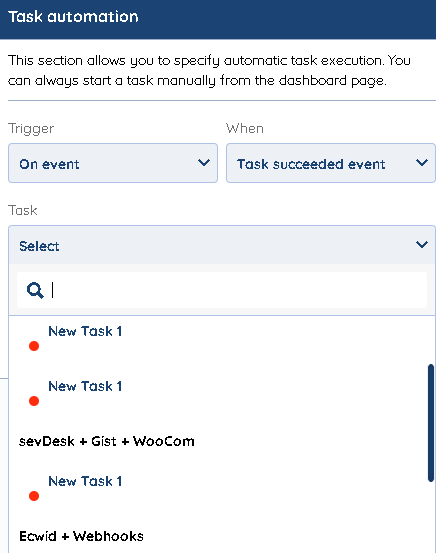
• trigger it on event - task succeeded event:
That means that you have to select ANY of your other tasks, whose successful completion will automatically prompt this task.
e.g. The task of somehow getting the data into the very same google sheet.
or
• on schedule. Either hourly, daily, weekly, monthly, etc.
e.g. If you wanted SyncSpider to check every 15 minutes for newly added products, you would set it hourly at minutes 15, 30 and 40, as shown in the picture below:

As promised, we will briefly touch on product updates.
It is recommended you set up another task for this, even though it will be similar to the previous one.
Since we will be only synchronizing stock and price, select "SKU", "Price" and "Stock" as unique columns while configuring the source integration.
Then, select "only update products" in the target configuration screen.

Lastly, since this will only update products, and not create new ones, you only need to map SKU, price, and stock, as shown in the pictures below:


IMPORTANT: For the stock and price sync to work correctly, SKUs from the source NEED TO MATCH with SKUs from the target. Otherwise, SyncSpider will treat unmatched SKUs as new products, and do nothing with them.
We hope you found this Article helpful :)
If you still have any questions or inquiries left unanswered, please shoot us a message via our website's chat widget or get in touch with us on our Facebook page, and our Customer Support Representatives will be more than happy to assist you.
Was this article helpful?
That’s Great!
Thank you for your feedback
Sorry! We couldn't be helpful
Thank you for your feedback
Feedback sent
We appreciate your effort and will try to fix the article