TABLE OF CONTENTS
Description
Outgrow allows you to build surveys that can be launched on multiple platforms with just a few clicks. Launch media-rich surveys in minutes using our ready-to-use templates. Gauge customer opinion, gather insights, and generate leads in the process. Transfer lead data seamlessly to 1000+ CRM and marketing software integrations. Connect with your audience seamlessly with Outgrow's new-age surveying software.Try it out today!
Entities
| Source | Target |
| Lead | NONE |
| Visit |
Possible Task Triggers are API calls upon the correspondent events.
Steps
Step 1. Creating a Task
Either while Creating a Task or in the Integrations menu.
Enter the name of the integration in the search bar.
Important: Freelancer and Essential plans on Outgrow do not include Webhook, Business and Enterprise plans include access to Webhooks through which users can send the lead data from Outgrow.
Step 2. Enter Name and Description
Enter the Name of the Integration.
You can optionally also enter a description.
Step 3. Adding Credentials
You will be prompted for the Webhook.
Step 4. Creating Webhook
In the next window select the required data entity (Lead or Visit), check the box for Capture Webhook Response and click the clipboard icon to copy the Webhook URL.
Note: keep this tab open until you get the webhook response after triggering (see next steps).
In another tab or window log in to Outgrow account.
Proceed to click on your account profile picture in the top right-hand corner and go to the section for Billing and Settings --> Global Webhook.
Alternatively, navigate to the Builder --> Configure --> Integration on your Outgrow calculator or quiz. Select Webhooks from the secondary navigation as shown in the illustration below.

Paste your SyncSpider Webhook URL.
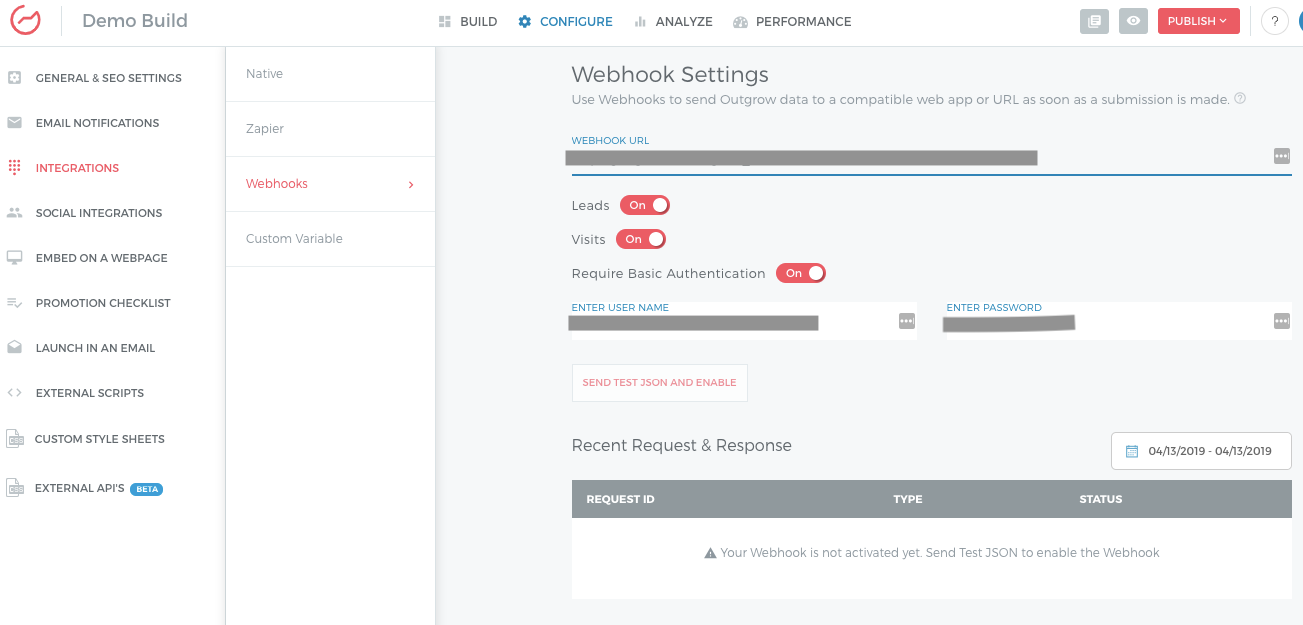
To get a Webhook response send a test payload delivery by clicking the Send test JSON & Save button.
In Outgrow status response code 200 and green tick icon will appear if the payload delivery was successful.

Go back to SyncSpider to verify that your Webhook response has been successfully captured. This will be indicated through text body of the response appearing in the setup window.

Step 5. New Visit Webhook Event ( Optional)
Perform Steps 4-8 for the New Visit Webhook event.
Verify new webhook response in SyncSpider.
Alternatively, you can use one Webhook for both events.
Finish/Save your new integration.
Outgrow is just one of the tools we support!
To check the list of the tools and features we support please click here!
If you don't see your favorite tool on our list, please take the time and send us the request here to create an integration for you or UP-vote if it's already on the list :)
We develop integrations based on the requests and up-votes :)
We hope that this covers everything. If you have any further questions or need additional clarification please reach out to us via [email protected] or our chat widget!
Was this article helpful?
That’s Great!
Thank you for your feedback
Sorry! We couldn't be helpful
Thank you for your feedback
Feedback sent
We appreciate your effort and will try to fix the article