TABLE OF CONTENTS
Description
Magento is an ecommerce platform built on open source technology which provides online merchants with a flexible shopping cart system, as well as control over the look, content and functionality of their online store. Magento offers powerful marketing, search engine optimization, and catalog-management tools.
Entities
| Source | Target |
| Category | Category |
| Customer | Customer |
| Order | Order |
| Product | Product |
| Order Update | |
| Product Update |
Steps
Step 1.
Either while Creating a Task or in the Integrations menu.
Enter the name of the integration in the search bar.
Step 2.
Enter the Name of the Integration.
You can optionally also enter a description.
Step 3.
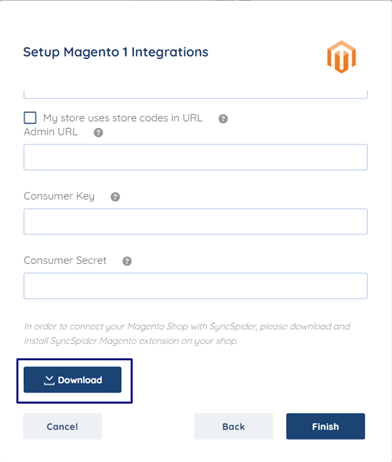
You will be prompted for the Website URL, Admin URL, Consumer Key and Consumer Secret.
Step 4.
Click on download for magento 1 extension zip file and unpack it locally and copy app directory to your Magento root. In Magento admin go to System -> Cache Management and click on button "Flush Magento Cache". Verify installation of SyncSpider extension in Magento configuration page,
STEP 5.
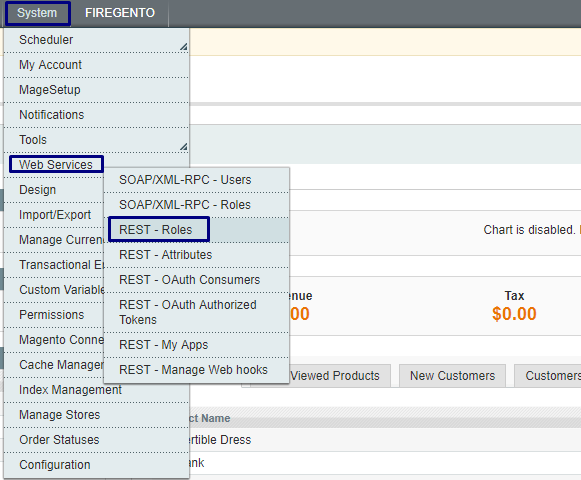
Now you have to create Admin role for that go to magento admin panel and click on system->Web Services -> REST-Roles and click on “Add Admin role”.

STEP 6.
Enter Role name and Admin Password (Through which you logged in to Control panel) and click on Save Role.

STEP 7.
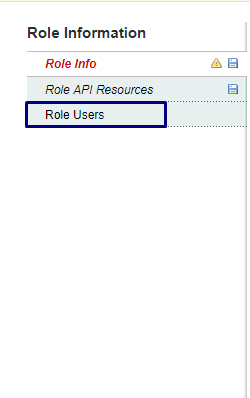
Now Click on Role API Resources and set resource access to All & Click on Button Save Role using admin password

STEP 8.
Click On Role User and Change search value to “any” and click on button “Search” & Select a user you want to assign this role to and click “Save Role” button again.

STEP 9.
Go to System -> Web Services -> REST – Attributes & Select admin role, In the resource Access option select “all” and click the save button.
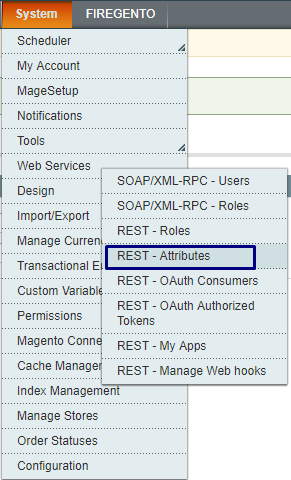

NOTE: Check after installation whether SyncSpider attributes are included in admin role.
STEP 10.
Go to System -> Web Services -> REST - OAuth Consumers & enter any name for integration and enter your current admin password, Copy Key and Secret & Click on Save

STEP 11.
In final Step enter Website URL of Magento shop, Magento Admin Control Panel URL, key & Secret obtain from Step 10 and click on Finish. Magento Authorization Pop UP page will appear, Click on Authorize and the integration is successfull.
Magento 1 is just one of the tools we support!
To check the list of the tools and features we support please click here!
If you don't see your favorite tool on our list, please take the time and send us the request here to create an integration for you or UP-vote if it's already on the list :)
We develop integrations based on the requests and up-votes :)
We hope that this covers everything. If you have any further questions or need additional clarification please reach out to us via [email protected] or our chat widget!
Was this article helpful?
That’s Great!
Thank you for your feedback
Sorry! We couldn't be helpful
Thank you for your feedback
Feedback sent
We appreciate your effort and will try to fix the article