First make sure the integrated platform supports webhooks integration
(google search "[integration title] webhooks", most often this will be sufficient if you go through the first 3 search results) AND webhooks is not a paid add-on.
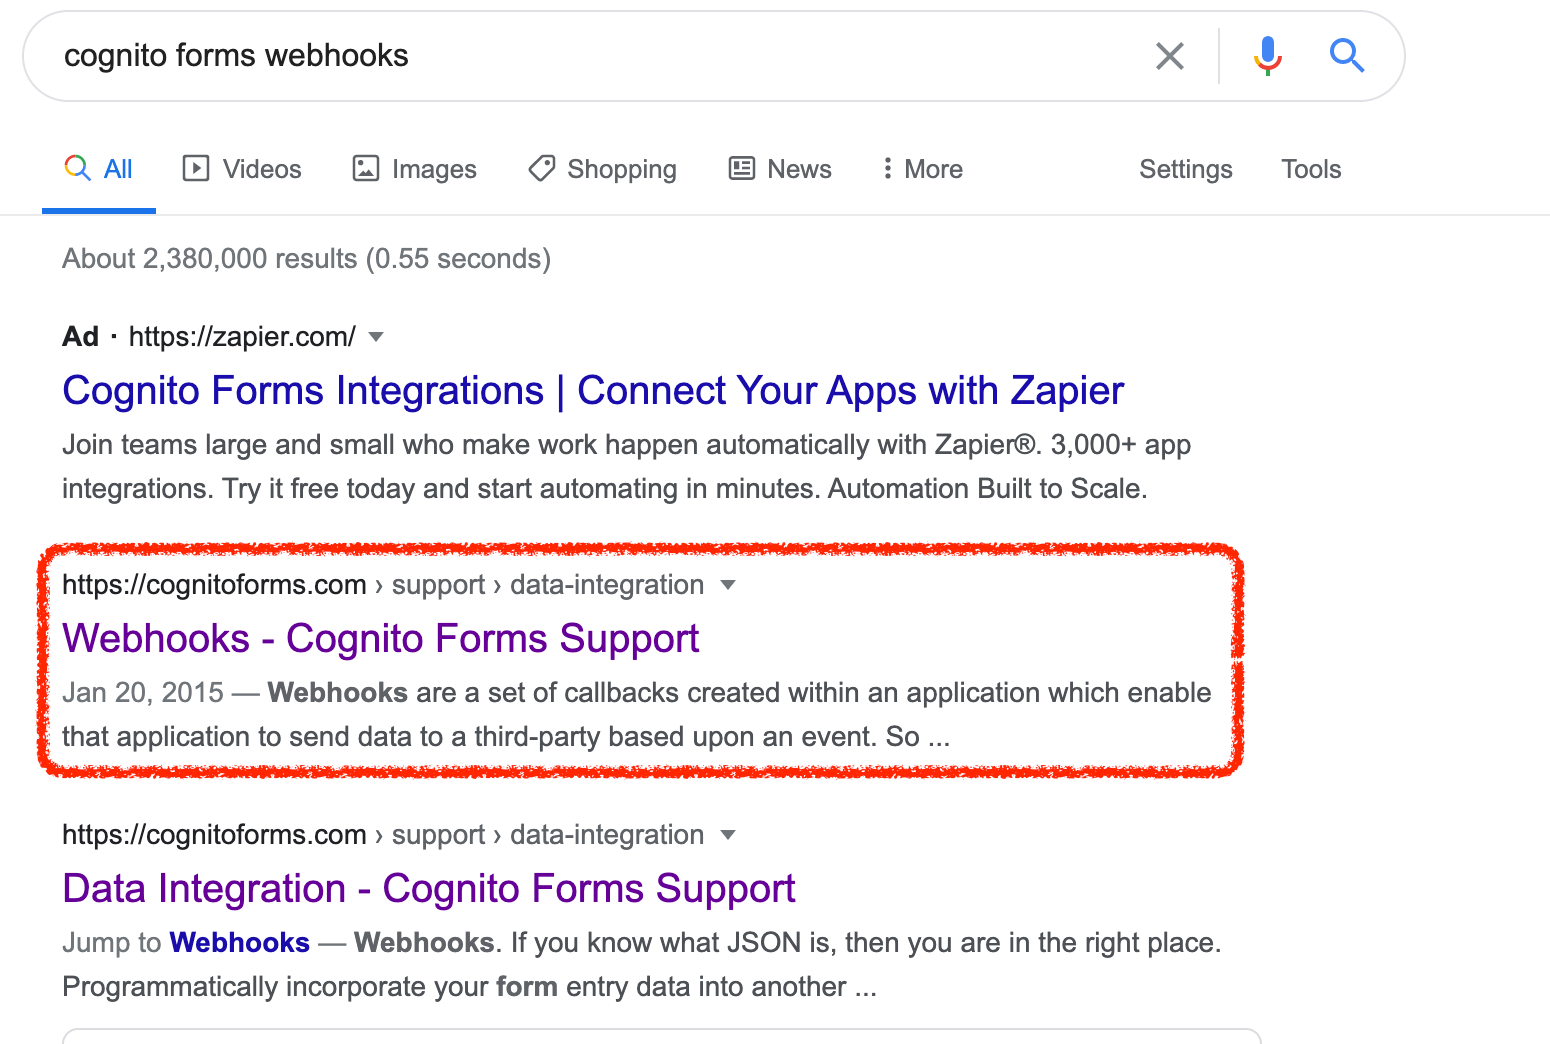
Make sure the integrated platform has free of charge sign-up/trial option (unless, of course, you'd be willing to acquire Webhooks integration feature additionally).
Step 1.
Go to "Custom Integrations" section from the toolbar on the left side.

Step 2.
Click on "+ Add custom integration".
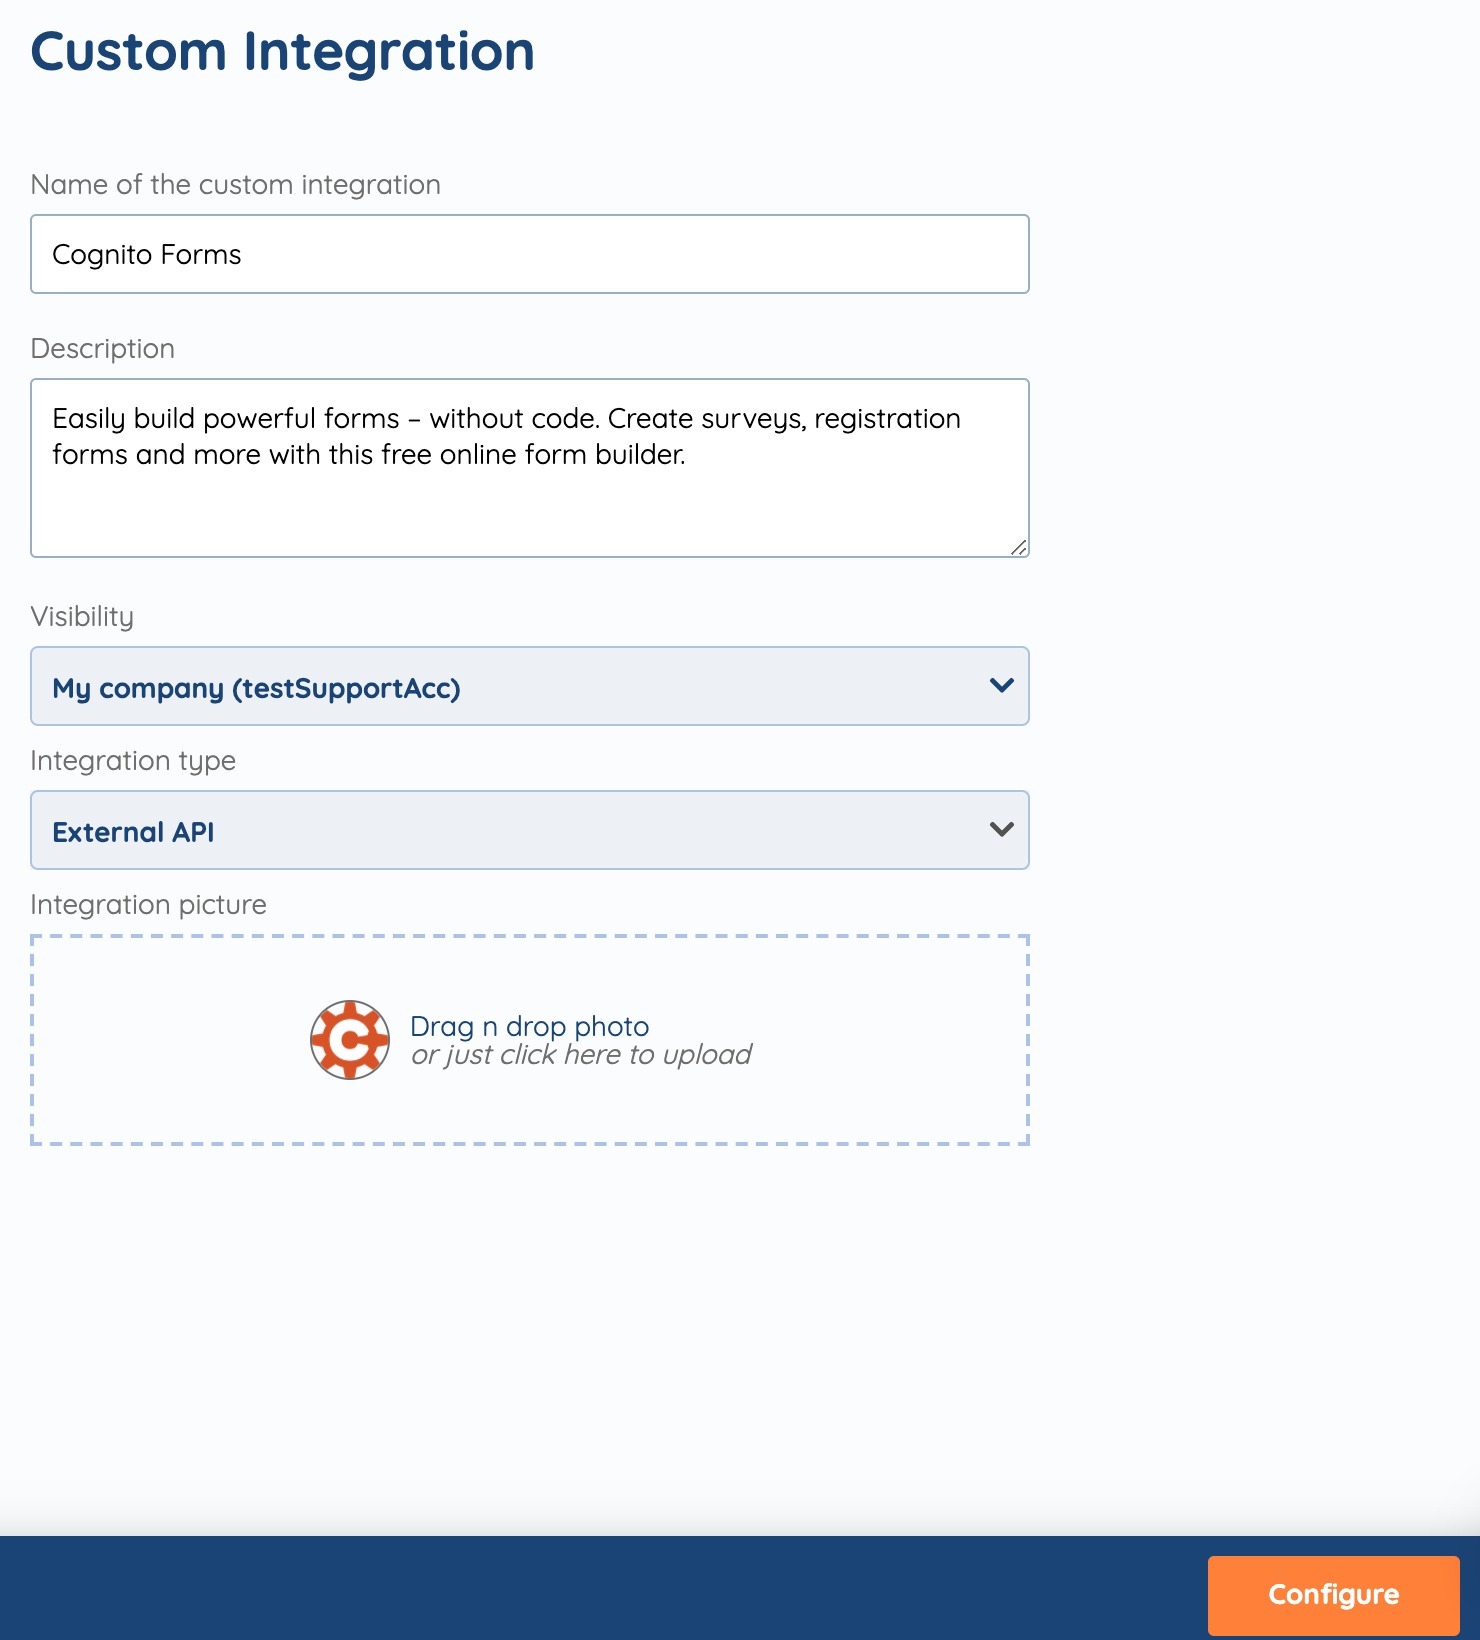
Step 3.
Fill in:
Name of the custom integration: the title of the integrated system AS IS
Description: primary uses of the platform for e-commerce (see existing descriptions in grey font for examples)
Visibility: make sure to ONLY set this to Public once you're confident it's up and running since all SyncSpider users will be able to view and use the integration
Integration type: External API
Integration picture: search your preferred browser for images of a square-shaped logo of the platform using keywords "[integration title] logo"

Example based on CognitoForms:
Step 4.
Proceed by clicking "Configure".
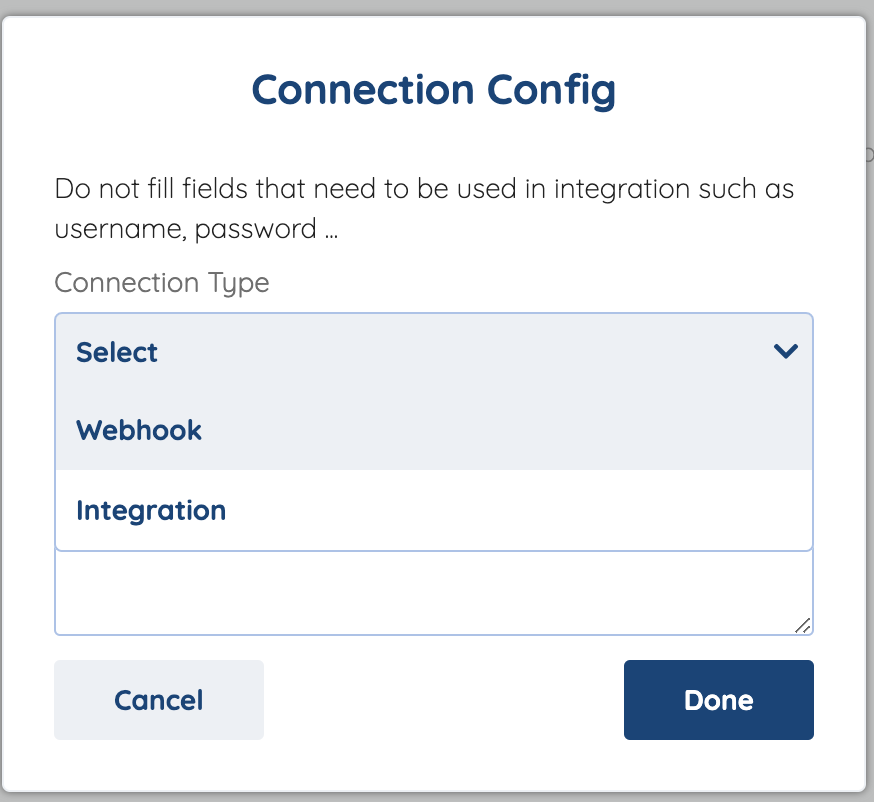
Step 5.
Go to "Connection Config" and select "Webhook" in the dropdown list for Connection Type. Click "Done".
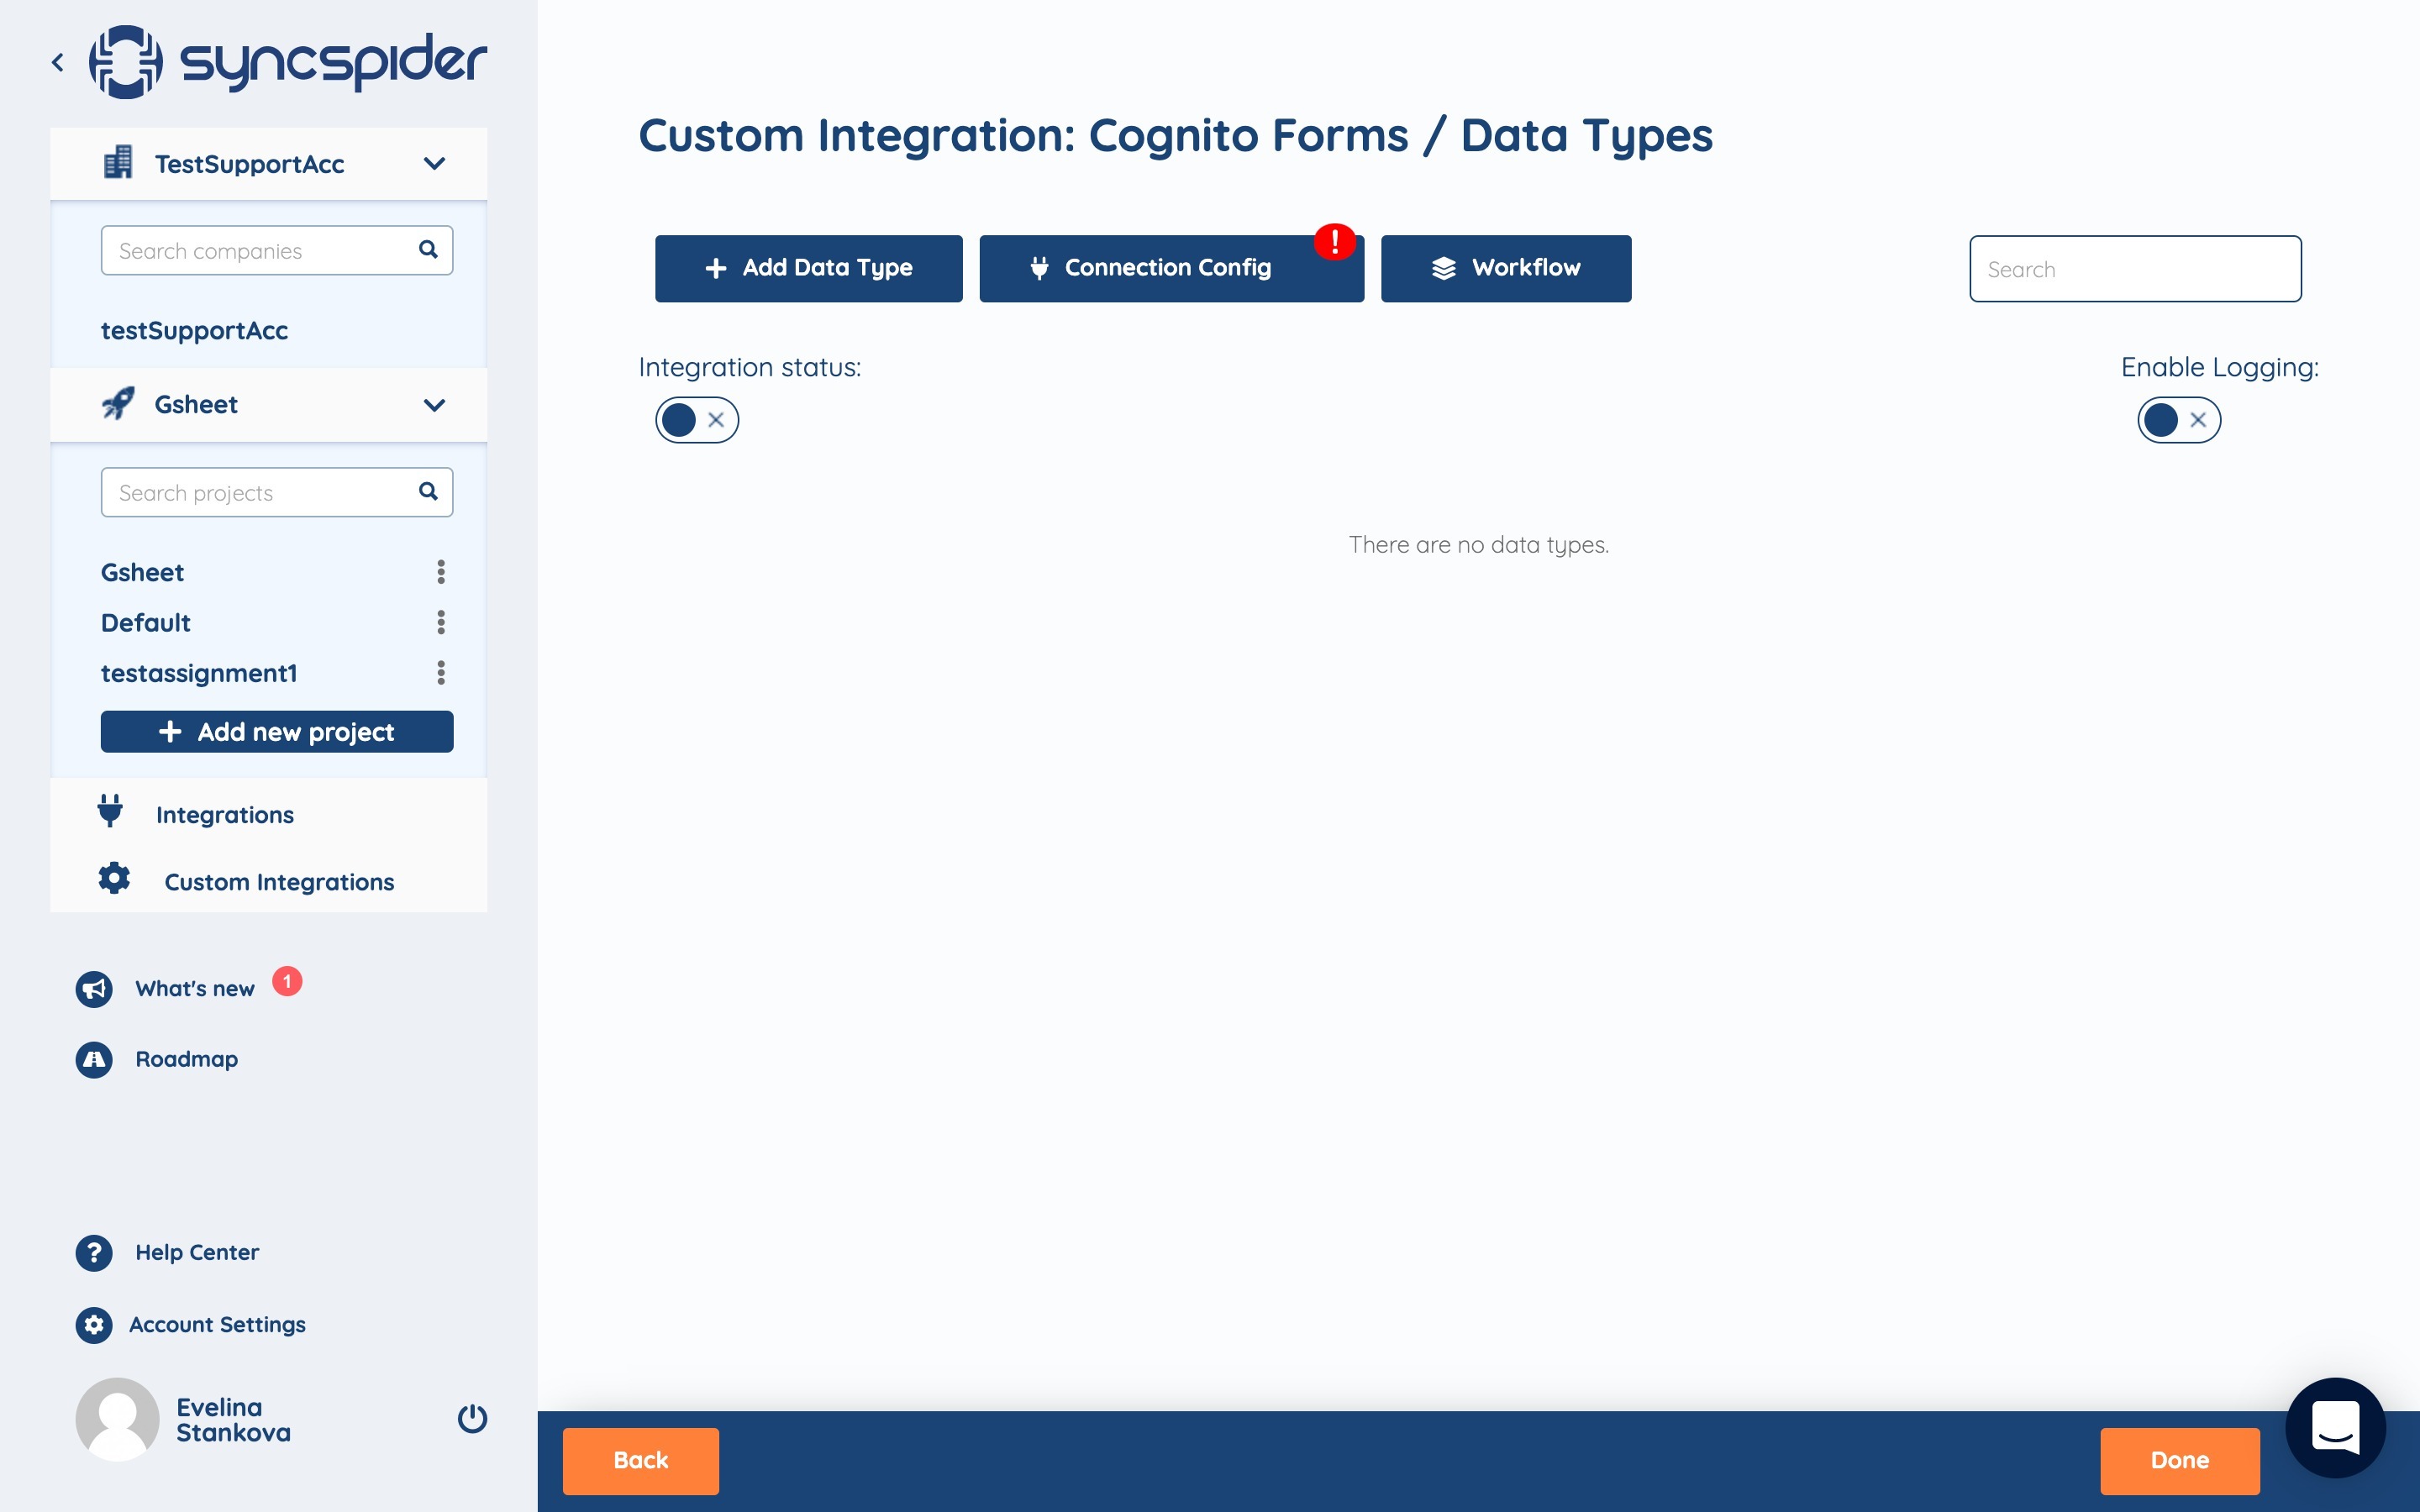
Step 6.
Go to "Add Data Type". Input "WebHook" and click Done.
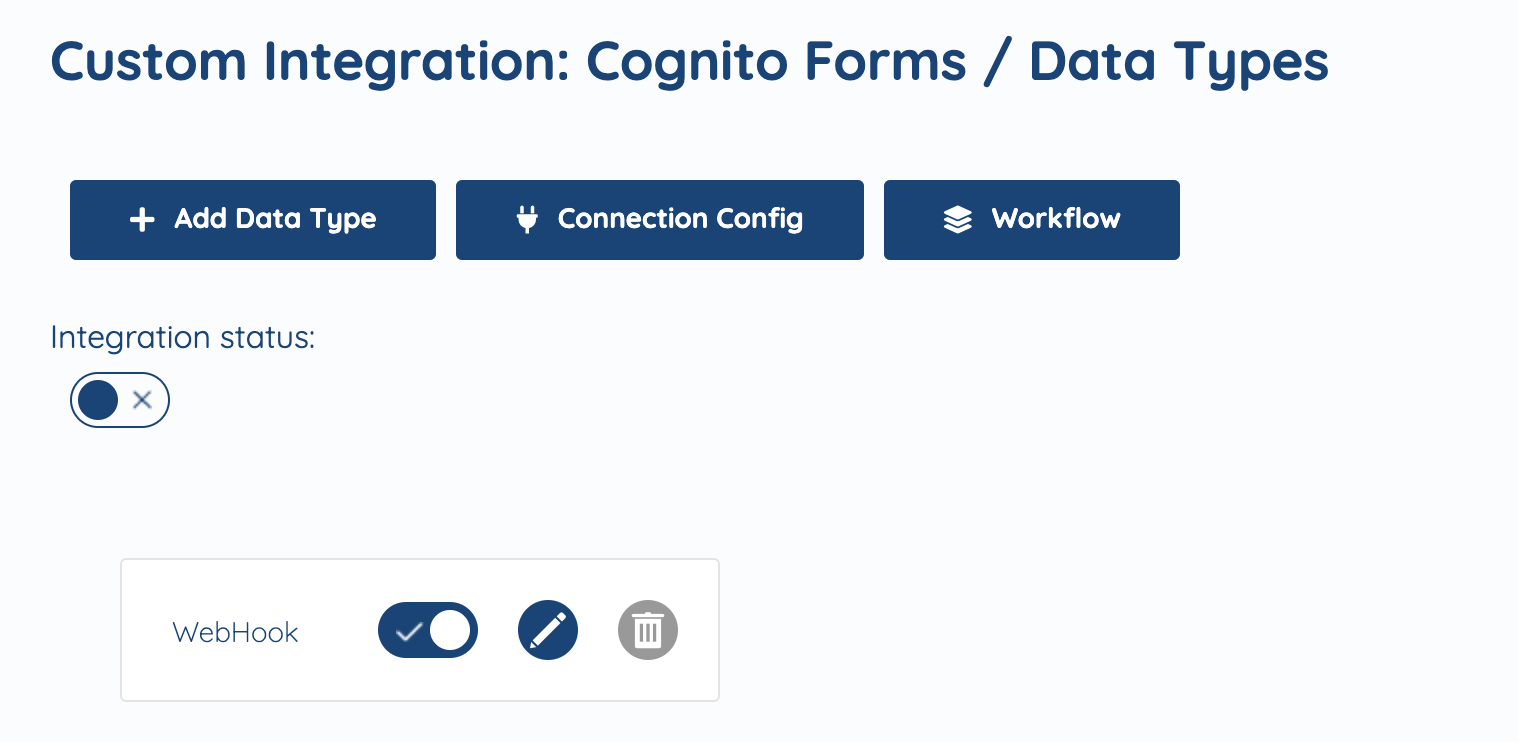
Step 7.
Now you'll have a rectangle appear underneath the initial 3 buttons with the name of the Data Type you entered (WebHook in our case) and options to activate, edit or delete. NEITHER of those should be selected at this point, instead click the name of the added data type (the spot with the text itself).
Step 8.
You will be prompted to select a direction of the data flow (Import to SyncSpider pre-selected). Select the required option and click "Save&Next". You will now see that data type as activated.

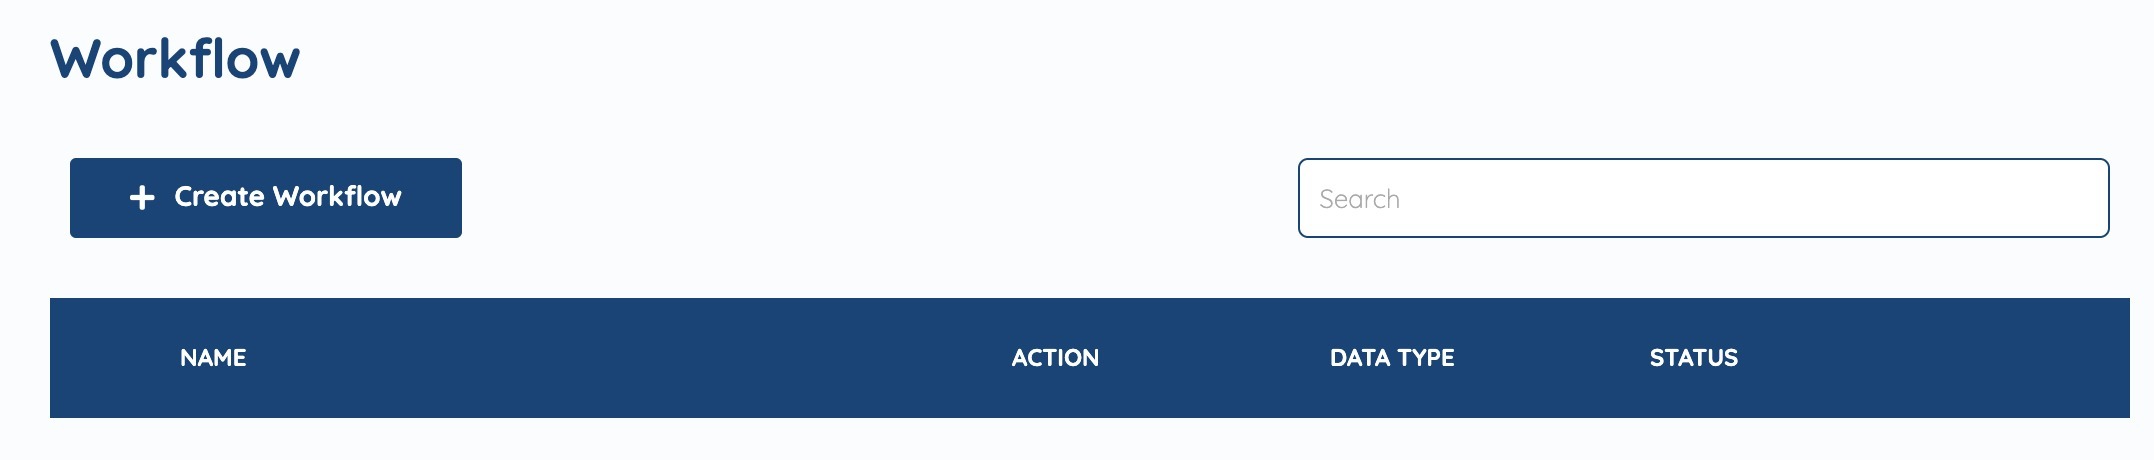
Step 9.
(optional) If you'd like to setup multiple possible activities operating with one Data Type, please use our Workflow feature by accessing the according section and adding a Workflow for selected Data Type.
Step 10.
Change the Integration Status to active by clicking the switch and click "Done"
Step 11.
Go to Integrations section and find your newly created integration.

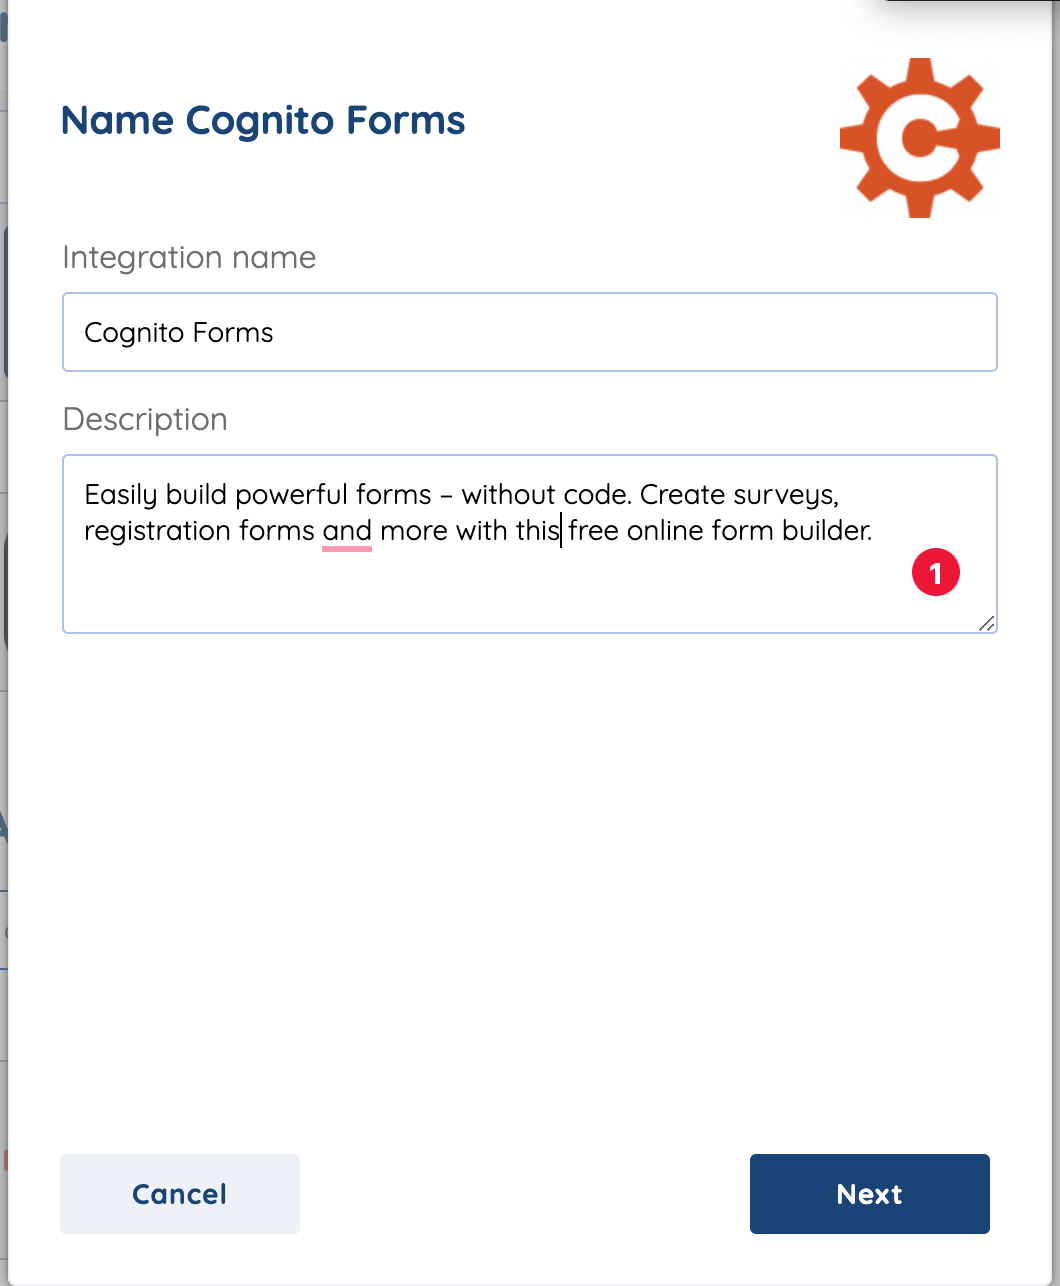
Step 12.
Click on the integration and fill in the Name and Description.
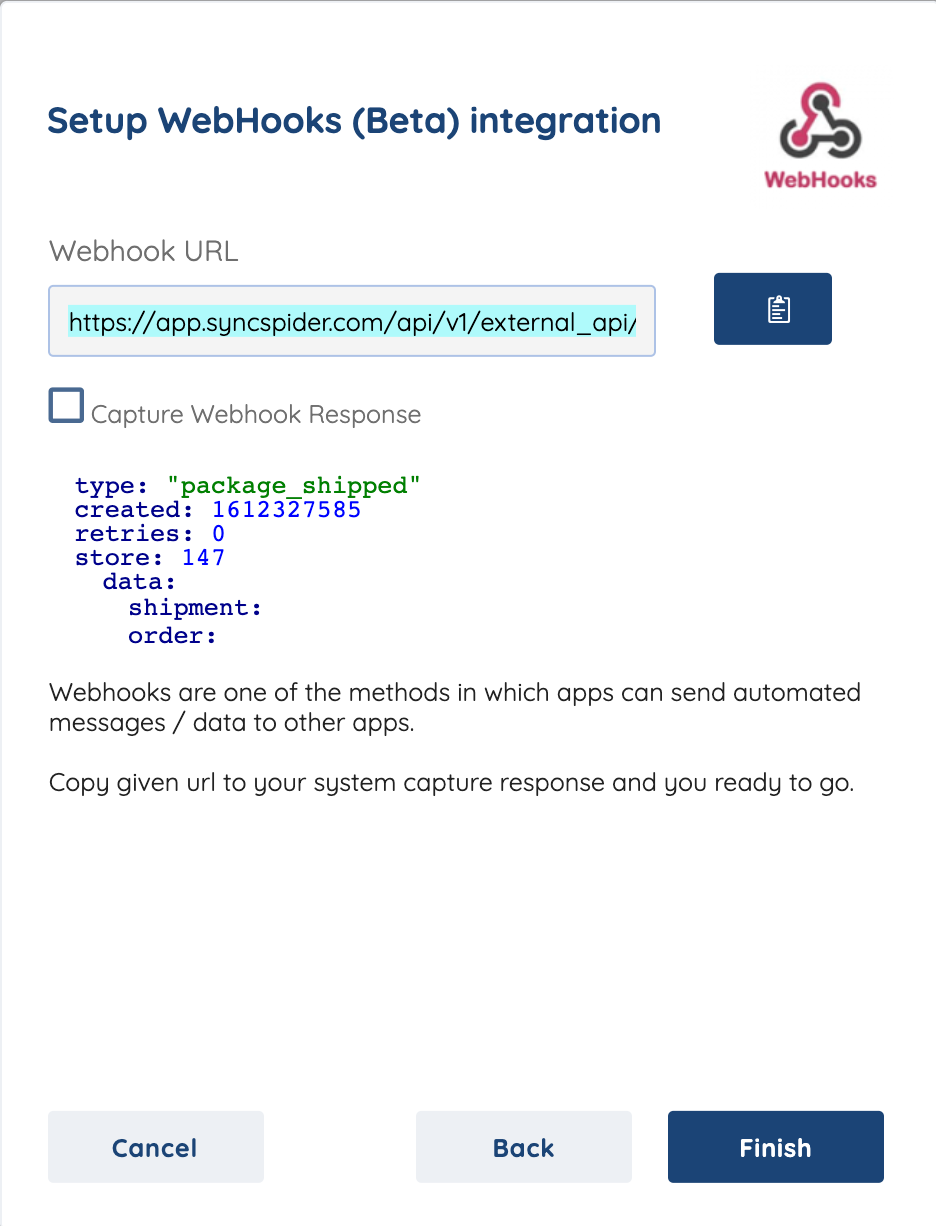
Step 13.
Copy the Webhook URL and check the box for "Capture Webhook Response"
Step 14.
Proceed to the integration platform and find where to put the Webhook URL and what will trigger a response.
Step 15.
Once the response is successfully triggered you will see JSON data appear in your SyncSpider integration pop-up window. Now Finish/Save your integration.
NOTE: Most often you will find the instructions on where to input the Webhook URL in the help/support section of the platform's website. It is important to read attentively which action will trigger the response since it is crucial for the integration setup. Make sure you can replicate the required action. In most cases, response will need to be captured separately for every action and data type combination intended to be setup and used.
To check the list of the tools and features we support please click here!
If you don't see your favorite tool on our list, please take the time and send us the request here to create an integration for you or UP-vote if it's already on the list :)
We develop integrations based on the requests and up-votes :)
We hope that this covers everything. If you have any further questions or need additional clarification please reach out to us via [email protected] or our chat widget!
Was this article helpful?
That’s Great!
Thank you for your feedback
Sorry! We couldn't be helpful
Thank you for your feedback
Feedback sent
We appreciate your effort and will try to fix the article