In this article, we will demonstrate how to send subscriber data from an email marketing platform Mailchimp to Google Sheets, by utilizing our WebHook Module.
The article will focus on automating this process, so you are always up-to-date with the newest subscribers/unsubscribers.
Webhooks are one of the methods in which apps can send automated messages/data to other apps.
Here, we will set up the process of how Webhooks can be used to grab data from Mailchimp.
Step 1:
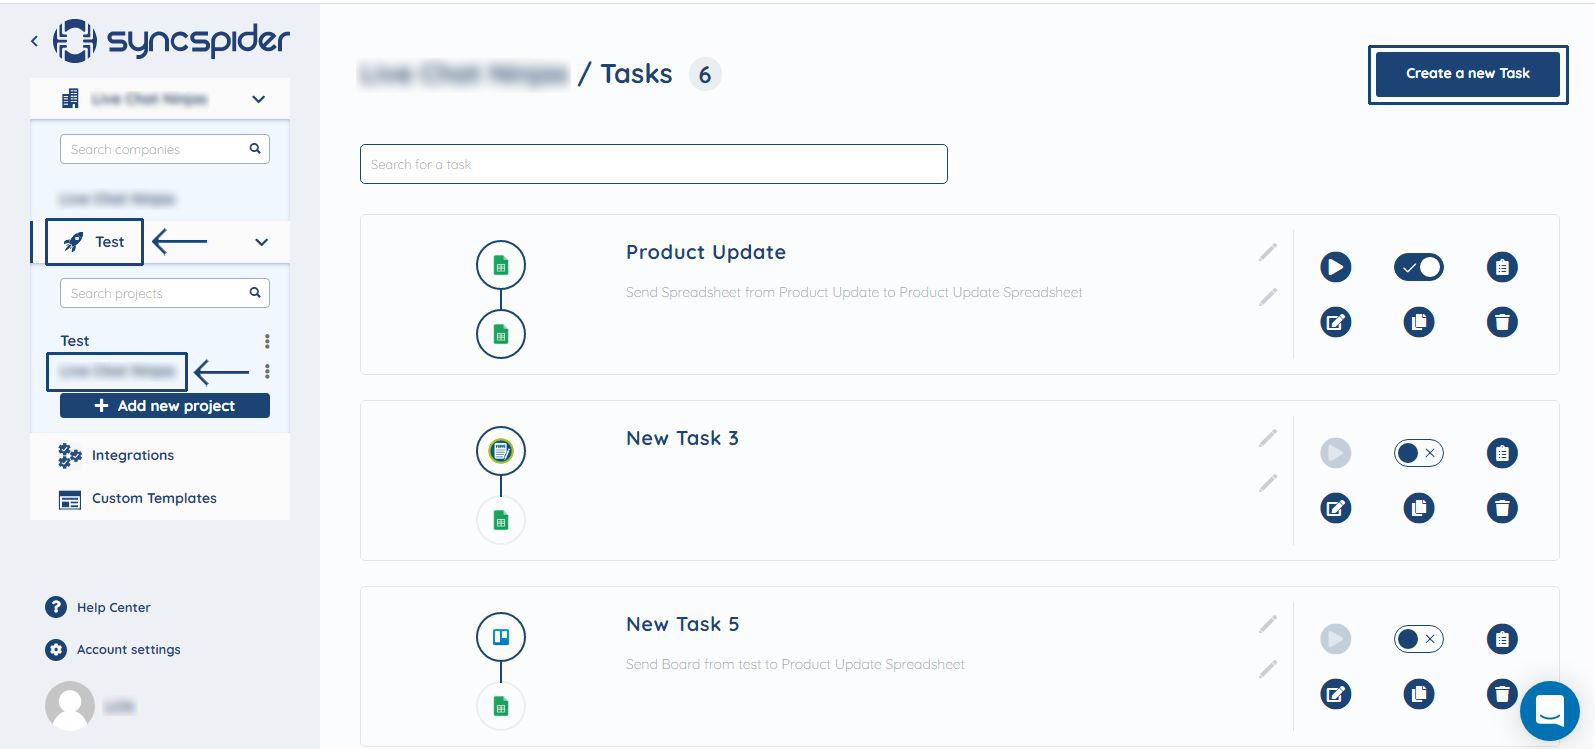
First, log in to your SyncSpider account, click on ‘Projects’ located at the left side, as shown below, and then click on 'create a new task'.
Step 2:
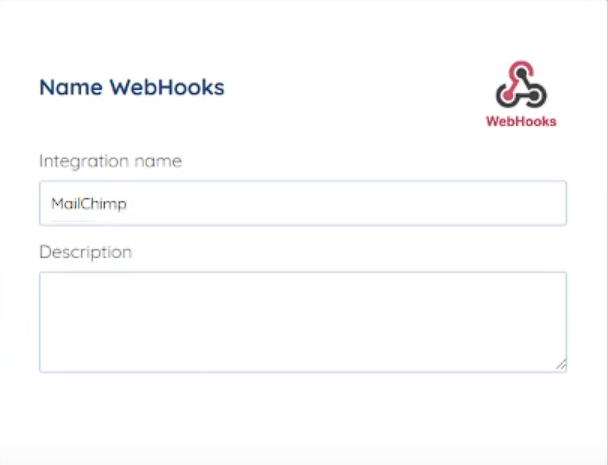
In the add new integration, select Webhooks, enter the integration name and description. Click Next.

Now you will need the website URL, which you can get from Mailchimp to connect to SyncSpider.

Log in to Mailchimp with your credentials and copy the URL. Make sure to copy only the base URL, as highlighted in the picture.
To generate the API key, you would need to login into your MailChimp account and follow this link.
Or
Follow these steps :
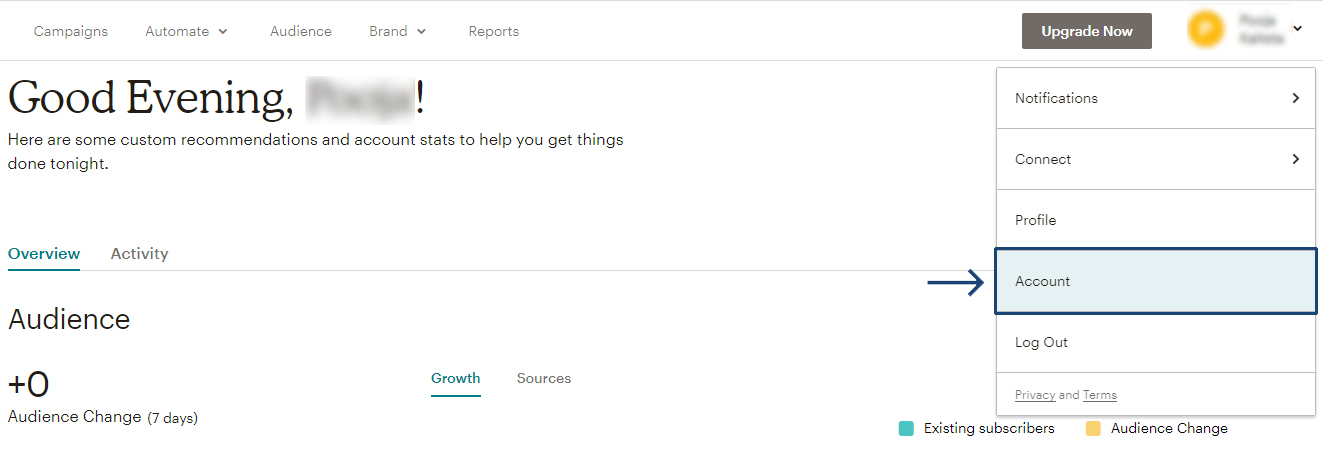
Click on Account located on the right side of the screen as shown below.
2. In the screen that opens, click on Extras- API keys as in the screenshot.

3. The API key is now visible.

You can copy and paste this API key from Mailchimp to your SyncSpider account and click finish.
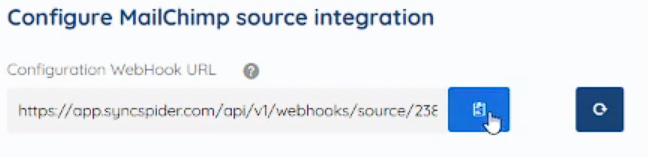
The next step is sending the configuration that we want to set from SyncSpider to Mailchimp. The first step is copying the Configuration Webhook URL:
Next, go to your Mailchimp account, click on Audience> Settings> Create a new Webhook. And copy the Configuration URL into the prompted field.

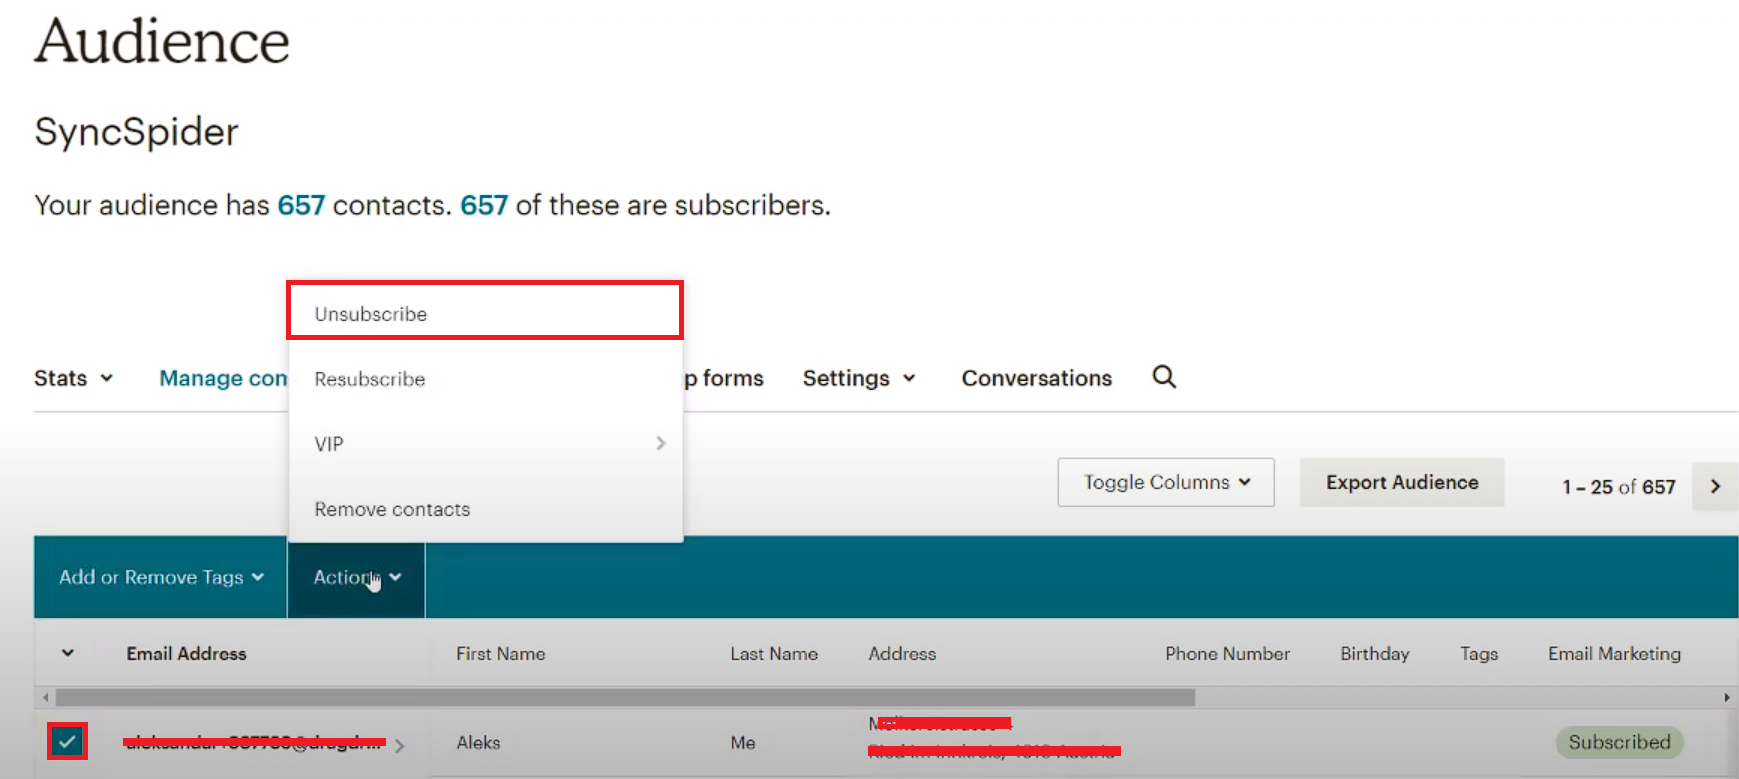
The next step is to send at least one piece of information from Mailchimp to SyncSpider in order for the template source data to become available in our task. We can do that by clicking on Audience> View Contacts> Selecting at least one Contact> Actions> Unsubscribe.
Now, after clicking on the refresh button, next to the Configuration URL, you will be able to access select which source you want to use, from the Source Schema in the Webhook. More precisely, which attributes you want to be exporting.
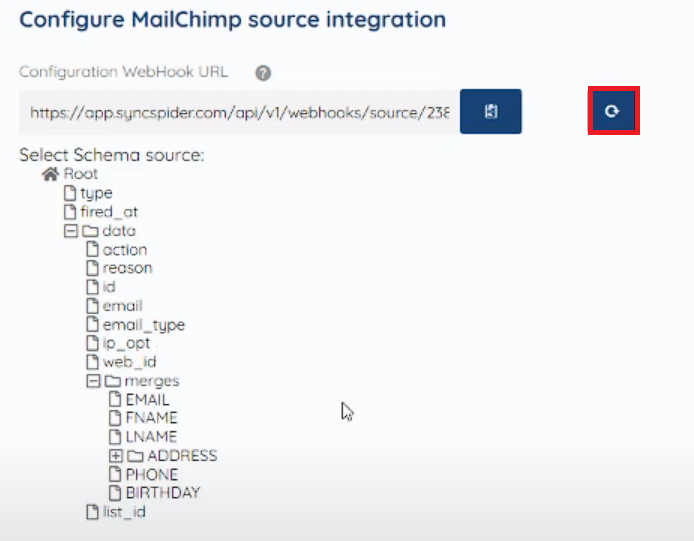
After selecting your attributes click on Next and copy the proper Webhook URL by clicking on the button below.

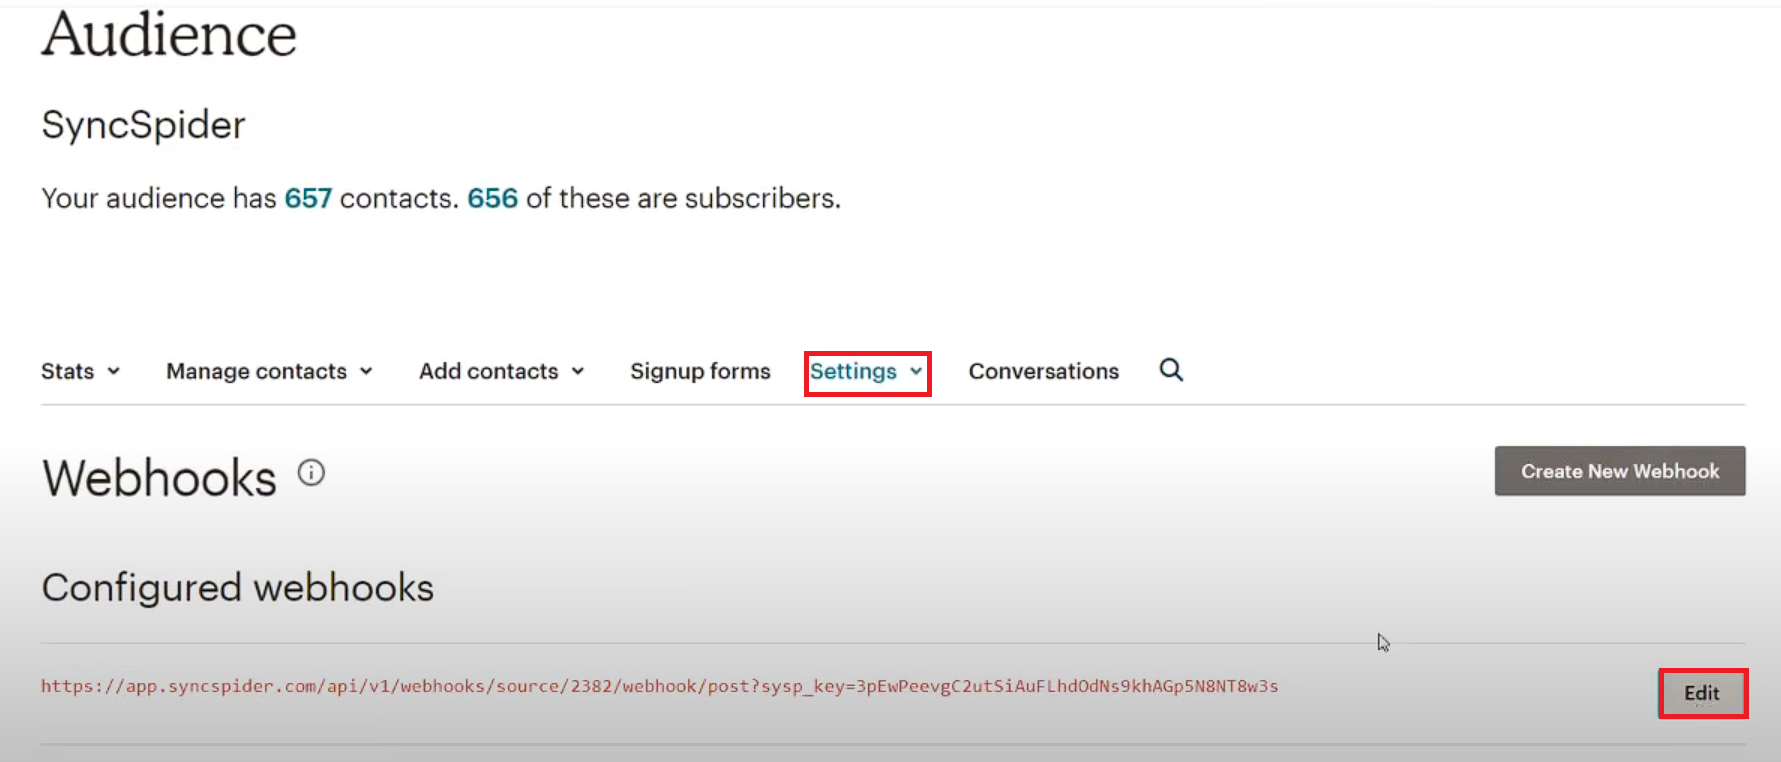
Next, go back to your Mailchimp and click on Settings> Webhooks> Edit.
.
And change the old URL:

The last steps are setting the filters, mapping, and setting triggers for the task.
And that's it! The data is now being grabbed from the Mailchimp.
Webhooks are just one of the tools we support!
To check the list of the tools and features we support please click here!
If you don't see your favorite tool on our list, please take the time and send us the request here to create an integration for you or UP-vote if it's already on the list :)
We develop integrations based on the requests and up-votes :)
We hope that this covers everything. If you have any further questions or need additional clarification please reach out to us via [email protected] or our chat widget!
Was this article helpful?
That’s Great!
Thank you for your feedback
Sorry! We couldn't be helpful
Thank you for your feedback
Feedback sent
We appreciate your effort and will try to fix the article