In this tutorial we will provide an example on how to use our Custom External API integration. Use-cases will wary depending on the API and the API connection type
Step 1.
Go to the main page and click on "Custom Integrations"

Then click on "ADD CUSTOM INTEGRATION"

Step 2.
Name the integration and put a description (Optional) .
After that, You set the visibility . Set it to your company, or to a specific company under your Main Company

IMPORTANT NOTE: If you want to set it public, contact the support because an developer has to check the integration and approve it.
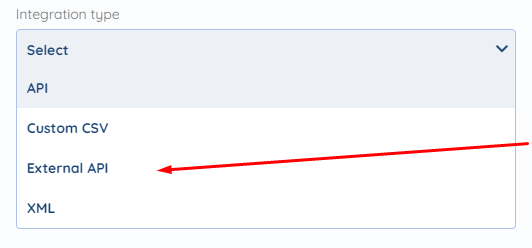
After that , set the Integration Type to "External API"
Next step (Optional) is to set the Integration Picture

Step 3.
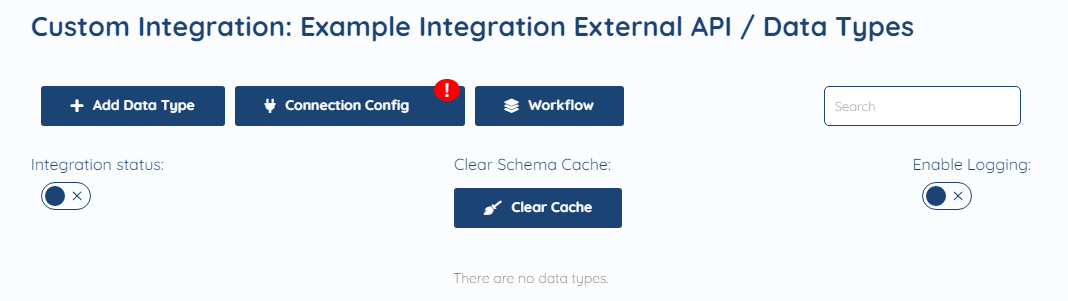
When you have added all the information click on "Configure" .
Now, we get to the "Data Type" and "Connection" Configuration. We are skipping Workflow as it is not available for Users.
Step 4.
Click on "Add Data Type"
The Data Type is where we specify the API endpoint we want to use for our template. We can add as many Data Types as needed for this integration.
Name the data type for the specific endpoint you are creating at the moment.
In our case we are using Flowlu's API documentation, and the Data Type (Entity) is "Get Accounts" so we will name it "Get Accounts"

Now we go to the configuration of the Data Type by clicking "Done" and then clicking on the Data type itself.
We have 3 stages of Configuration of the Data Type :
-CONFIG
-PAGINATION
-SCHEMA
Step 5.
Now we will set up the CONFIG Part of the data type.
Here are all the options

First step is the Request type. Here we will set "GET" as we are trying to get accounts.

Now we need to add the "Endpoint" For the specific data type. Endpoint is everything after the base URL of the specific request type, in this case we can find it under Flowlu's "CRM" GET --> Account field,
Whole URL: https://{company}.flowlu.com/api/v1/module/crm/account/list
Base URL: https://{company}.flowlu.com
API Endpoint: /api/v1/module/crm/account/list
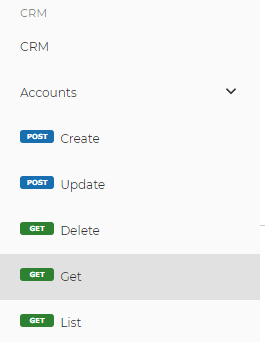

We add this endpoint to the API Endpoint Field

TYPE
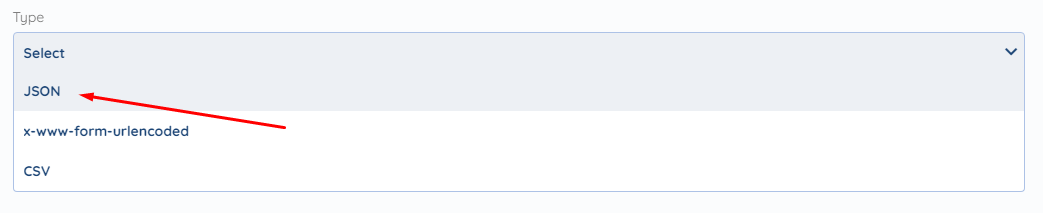
Next is the "Type" which in this case is JSON as we can see from the Documentation

We set it in SyncSpider to "JSON"
DIRECTION
After we set it to JSON, we now have the Direction of where the data goes. In this case we are using Import as we are Importing ( Using this Entity as Source Entity) Accounts to Syncspider .

Dynamic URL Option
Now we have the Dynamic URL Option
Dynamic URL fields represent fields tagged in the API Endpoint inside curly brackets "{id}". Example "/projects/{id}/customers" . For Users, they will be displayed in the source or destination configuration step, There are two types of dynamic URL fields:
1. Option type fields: will be displayed to users as HTML select box which values will be generated from specific selected Data type.
2. field type fields: will be displayed to users as an HTML input box, the input value of this field is filled by the user itself.
In this case we are not using it as our endpoint doesn't have an {id}
Keep parameter as it is? Option
Next option is "Keep parameter as it is?"

This option is used in case the BASE URL is in the endpoint field.
Example: https://{company}.flowlu.com/api/v1/module/crm/relation/list
Get Last Value from Parameter? Option

This option is used if you have a parameter you want to seperate something with.
Example:
Throttle Request
API throttling is the process of limiting the number of API requests a user can make in a certain period
In this option you can set how many Throttles SyncSpider limits the requests per minute and per second.

NOTE: In the API there is usually how much is the Throttle Limit. But for this specific use-case there was no Information.
We have configured everything that we need for this specific Entity so we click on "Save & Next"
PAGINATION
Now we move on to the Pagination settings. Here are all the settings that we have in Pagination :


Disable pagination
First we have Disable pagination
Used to disable pagination all together.
Page
In this case you will have to define the Page key, for some cases its just "p" or "page"

IMPORTANT NOTE: Define key for Page (to remove key from request type '-1')
Page Start from
Define start number for page pagination (0 or 1)
In this case we can find it in Flowlu's API documentation under the Basic methods field for LIST, As we can see the Default is 1 so we will set it to 1 In Syncspider.


Limit
Limit is the limit for the batch of data that you are sending per page. Usually the key is "limit" so we will set it to limit

IMPORTANT NOTE: Define key for Limit (to remove key from request type '-1')
Limit Batch
Here you will set the actually limit of the Data that you are batching per page, If you don't put a value here the default will be set to 25 in Syncspider. In Flowlu documentation we can see that the default is 50 and the maximum is 100, we will set 50 for this usecase.

There are some other options but these are the basic options for the user.
Now we click on "Save & Next" and we move to Schema.
Schema
Schema is the part where you modify and add the fields that you will use for your External API Integration.
Here are the options :
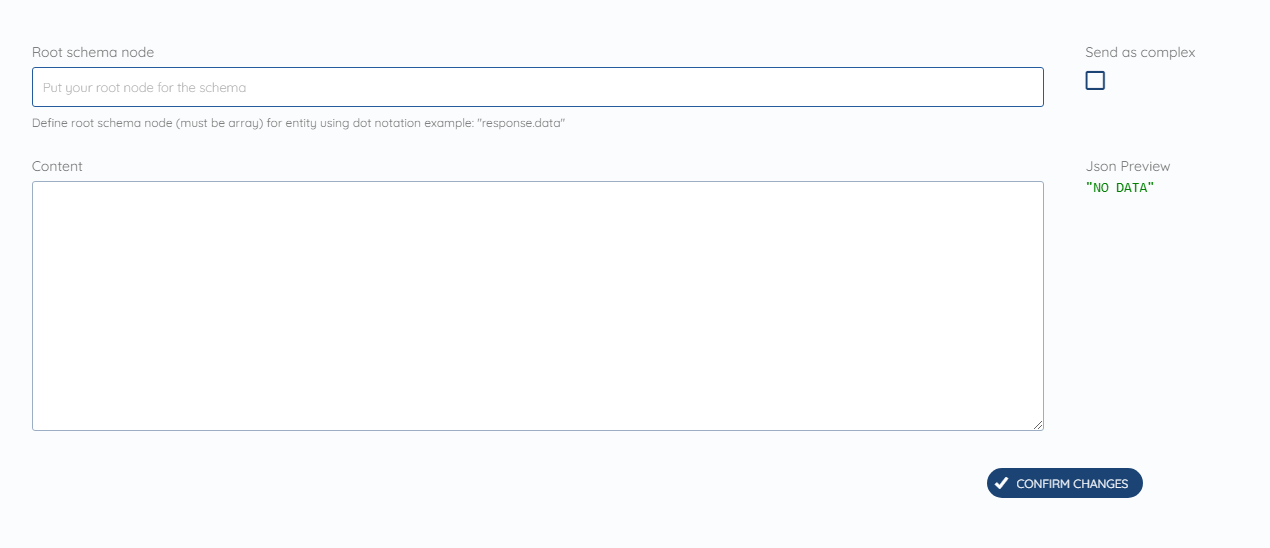
Content - Here is where you input your code (in this case JSON )
Root Schema Node - the action you are doing
Add Field - Add and configure a field of your choosing
For Root Schema node, we will be using "response.items" as we are trying to get all information from the "response" and Items has all the information that we need

For the Json code that we will be adding , it is everything from "{" to the "}" , so everything under items, as these are the information we are looking in the JSON data.

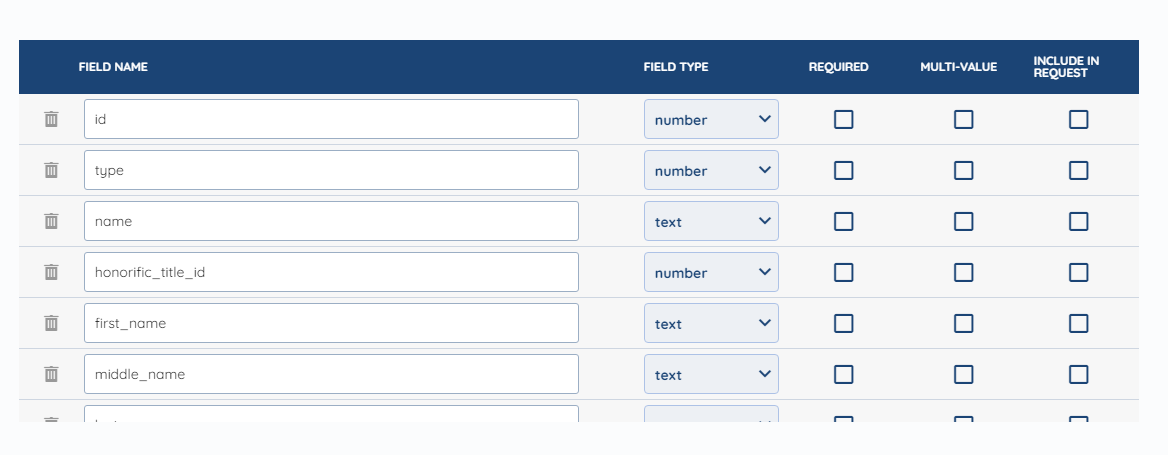
After you have added all this JSON to the "Content" In Syncspider. Click on "Generate Schema"

As you can see now, the JSON code created all the fields that we need from it, now you can modify the fields to your preference.
If you don't see your favorite tool on our list, please take the time and send us the request here to create an integration for you or UP-vote if it's already on the list :)
We develop integrations based on the requests and up-votes :)
We hope that this covers everything. If you have any further questions or need additional clarification please reach out to us via [email protected] or our chat widget!
Was this article helpful?
That’s Great!
Thank you for your feedback
Sorry! We couldn't be helpful
Thank you for your feedback
Feedback sent
We appreciate your effort and will try to fix the article